DIY Bedside Table – Never Thought It was so Easy to Make a Modern Wall Niche
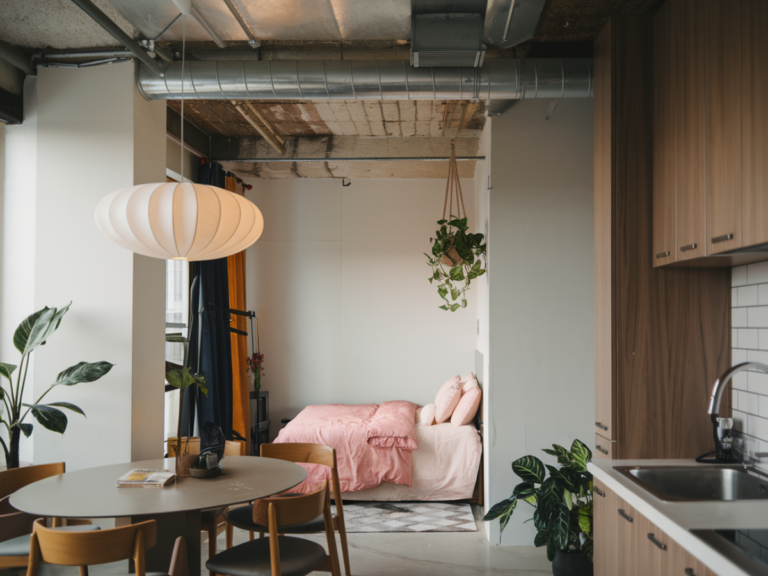
Details for the Bedroom Area of our Small Studio Apartment
DIY bedside table projects always sounded intimidating to me — until I realized that it would hardly fit into our small studio apartment.
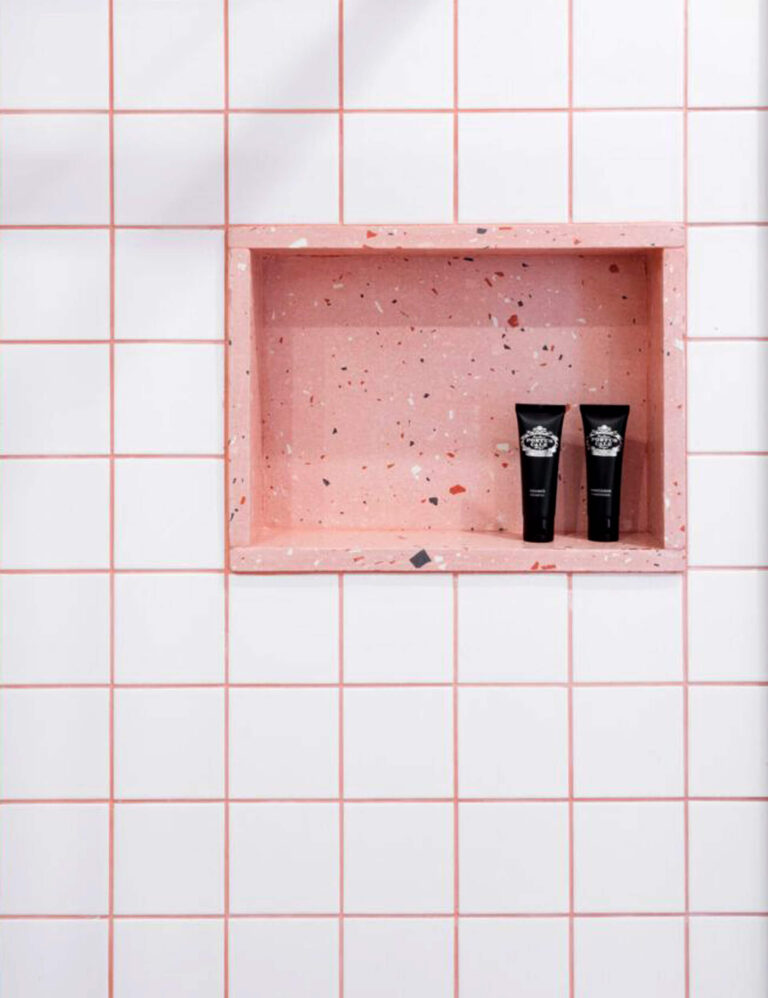
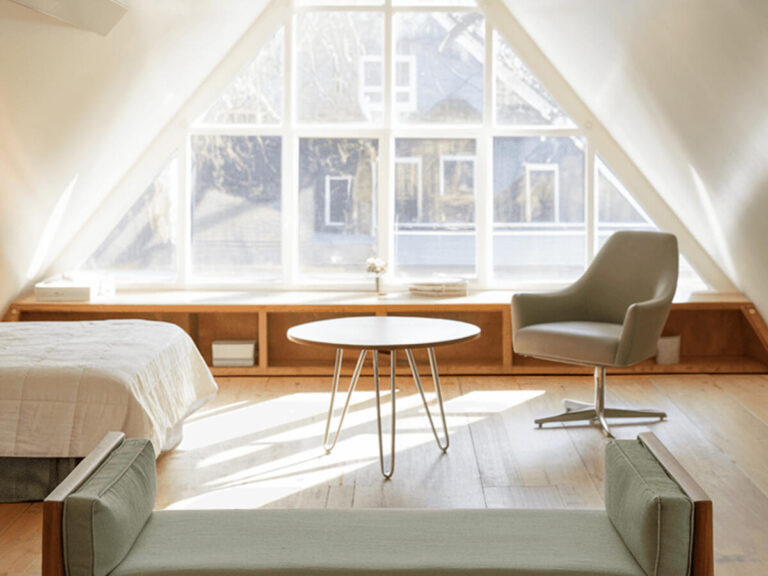
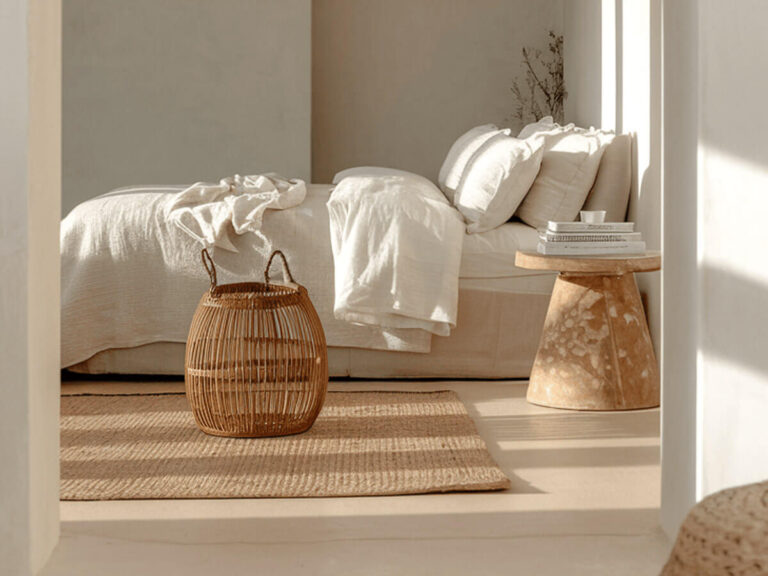
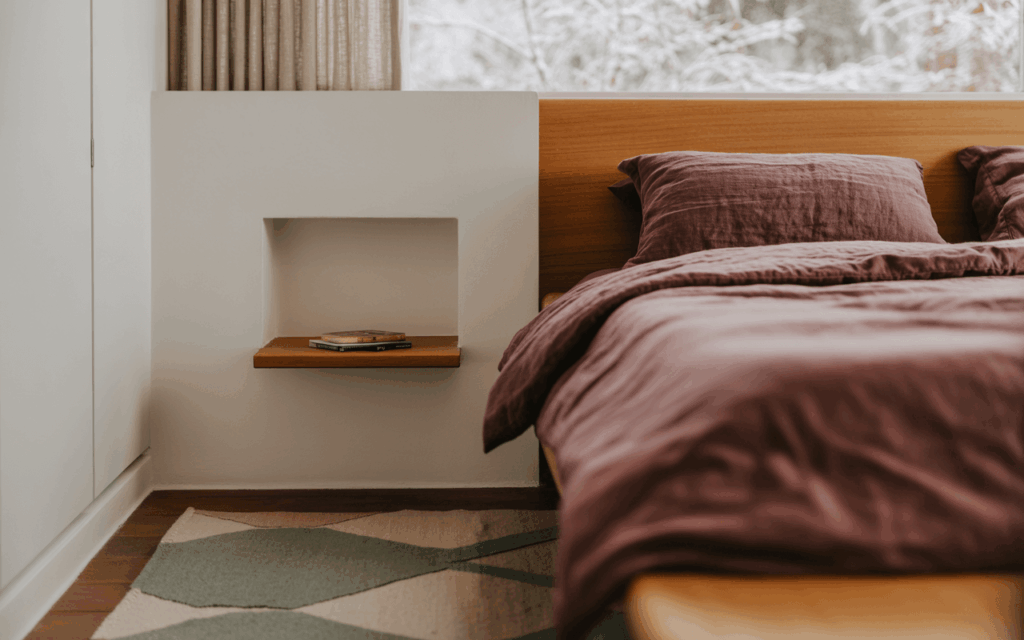
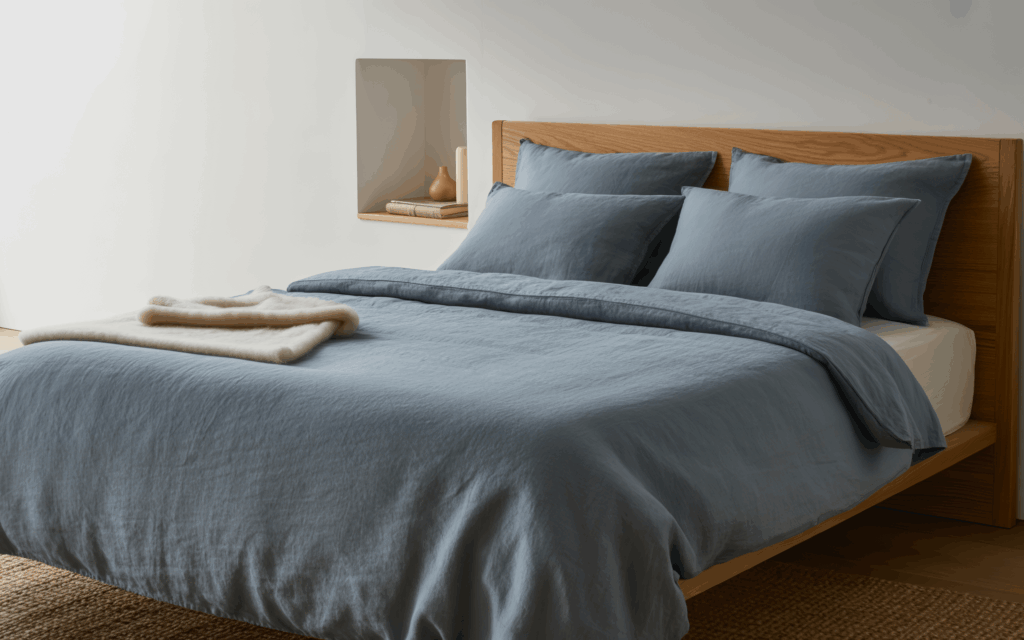
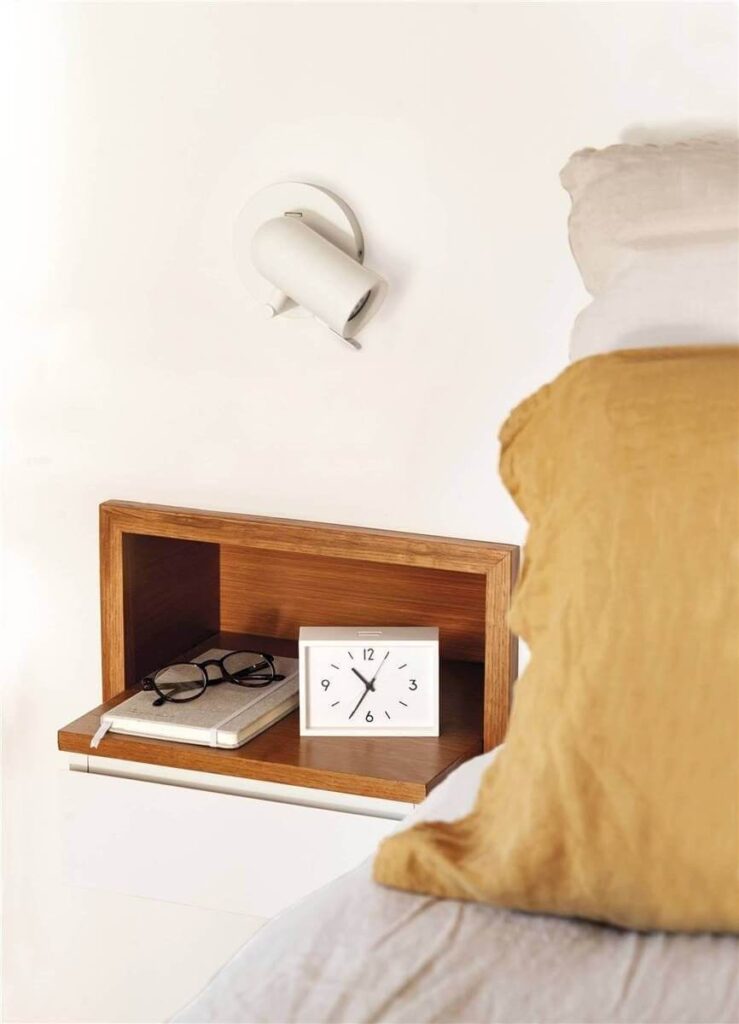
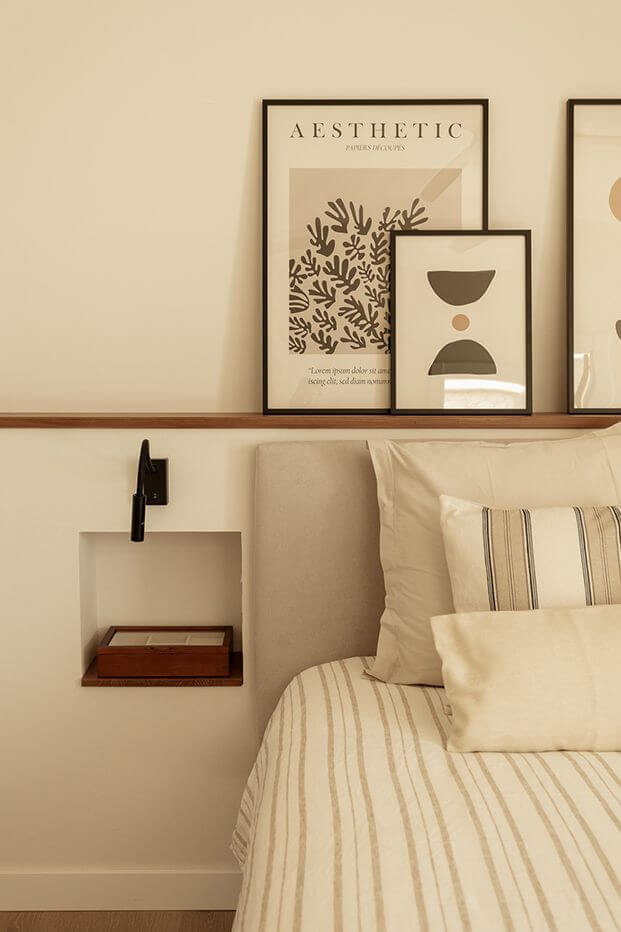
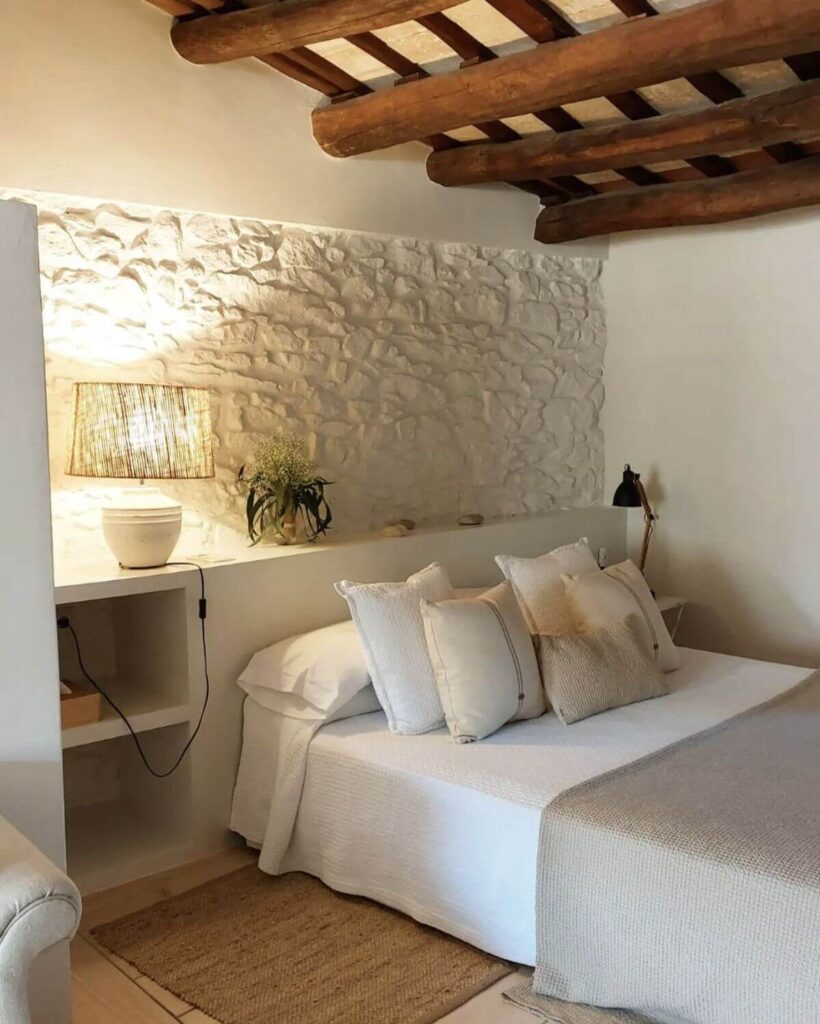
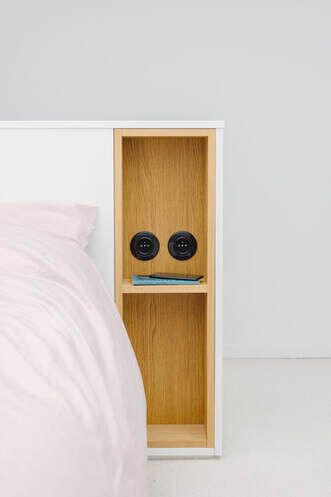
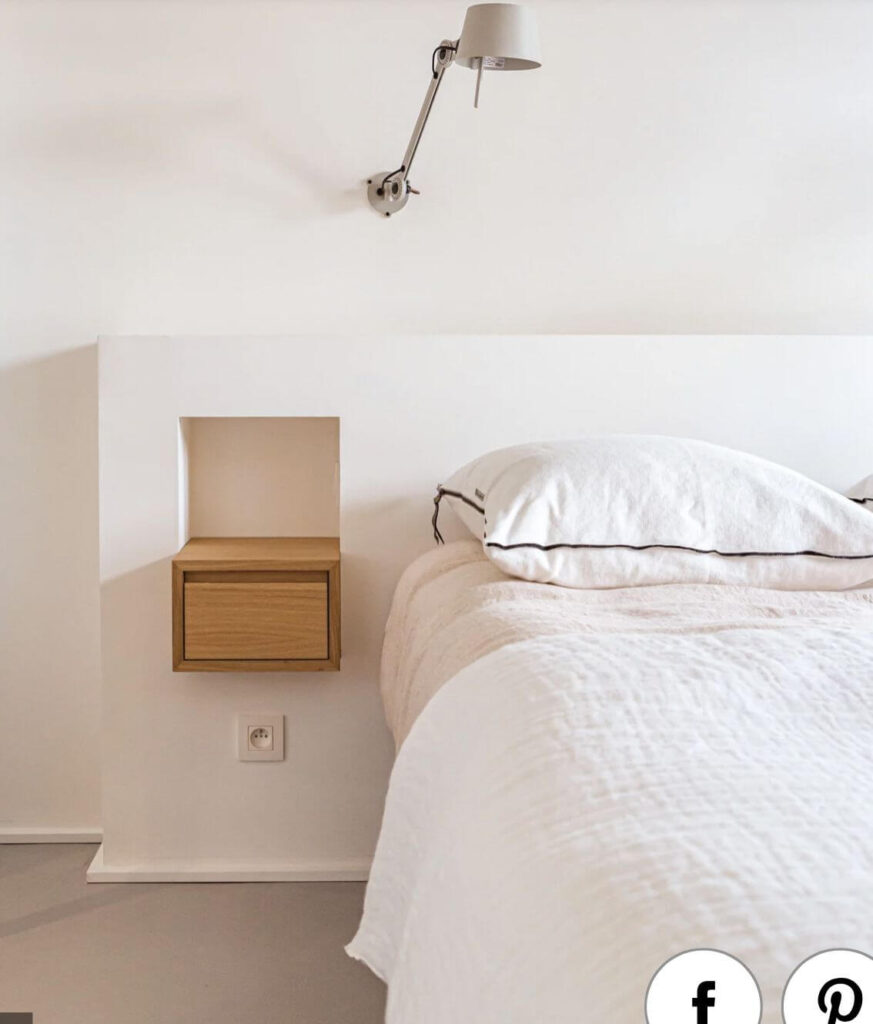
On the other hand, building a modern wall niche could actually be smarter, cleaner, and more space-efficient than placing a traditional nightstand next to the bed. My inspiration was something similar:
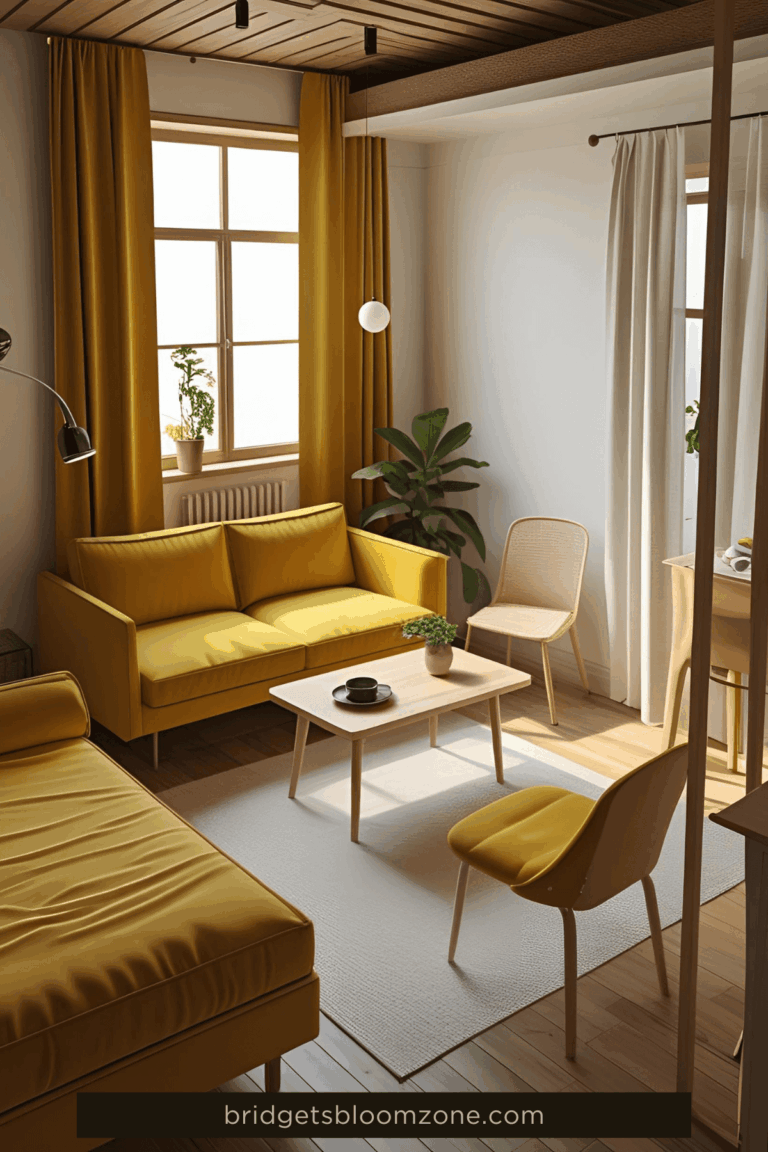
This post is part of my renovation diary, documenting the transformation of our small studio apartment’s bedroom–living room multiuse space. Here, every centimeter matters.
Every built-in element has to justify its existence. And sometimes the best shelf ideas for bedroom are not shelves at all — but carefully designed recessed wall niche ideas that solve multiple problems at once.
Today, I’m sharing how we built a DIY bedside table inside a newly constructed plasterboard service wall, what materials we used, the mistakes I made (of course), and how I’m planning to decorate this small but mighty bedroom niche.

A Wall Niche Instead of a Nightstand? Diy?
If you’ve seen the layout in my previous post, you know the bed placement wasn’t accidental. In a studio apartment, positioning the bed is defining the whole room or flat, as it occupies the most space.
Originally, I considered:
- A freestanding nightstand
- A wall mounted bedside table
- Floating wooden wall shelves
But here’s the issue:
The space next to the bed is limited. If you want to open the window, or just stand next to it, you would stand in place of the bedside table…
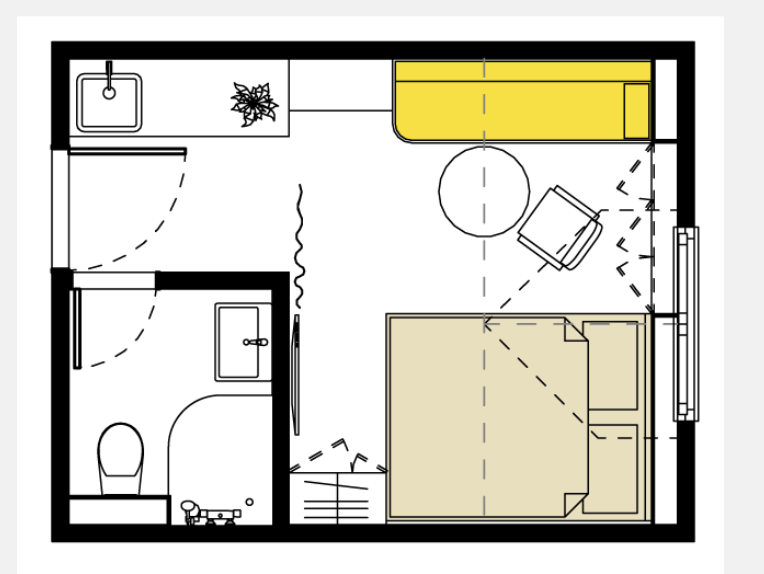
A freestanding piece would visually clutter the room. A wall mounted bedside table is a no-go here – we ll would bump into it and hurt ourselves.
Another issue was merely technical. Because of the reinforced concrete and brick structure, we couldn’t cut electricity routes into the original wall where the lamp switch was meant to go.
So instead of fighting the wall, we built a new one.
And if you’re already sacrificing a few centimeters for a plasterboard service wall… why not integrate a DIY bedside table as a modern wall niche?
Would I recommend this to a beginner? Not without preparation.
But look at these amazing examples, how stylish a modern wall niche can be:

Why a Modern Wall Niche Was the Only Option in This DIY Bedside Table
This wasn’t purely aesthetic. It started as a technical necessity.
The original wall is brick combined with reinforced concrete elements. Running new electrical wiring inside it would have been extremely invasive, expensive — and honestly, structurally unpleasant.
So we decided to build a plasterboard service wall:
- Wooden substructure
- Double-layer gypsum board
- Hidden electrical routing
Yes, it takes up space. But in small apartments, sometimes losing 7–10 cm (approx. 2,7-3,9 inch) strategically can actually make the layout cleaner.
And because that service wall occupied space anyway, it made sense to carve out a bedroom niche inside it — transforming a technical compromise into a design feature.
Architect brain: 1
Tiny apartment constraints: 0
This approach works in most small apartments with brick or concrete walls.
And I like to experiment – Let’s see how it turns out!
DIY Bedside Table — Planning the Niche
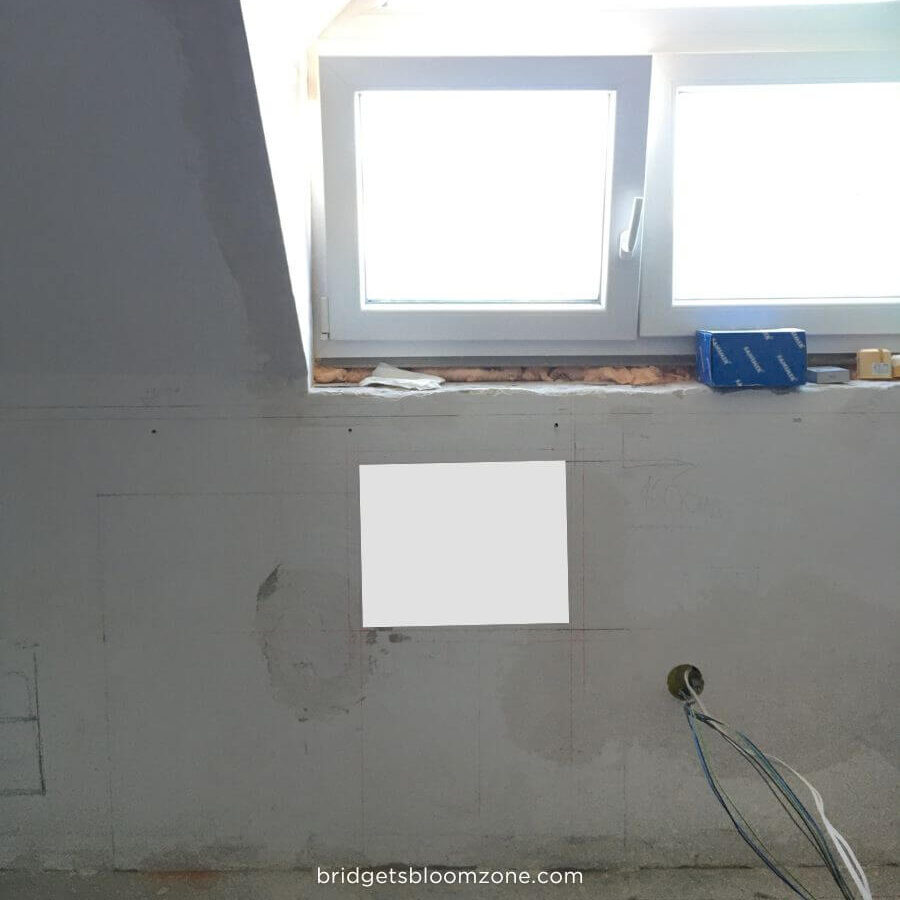
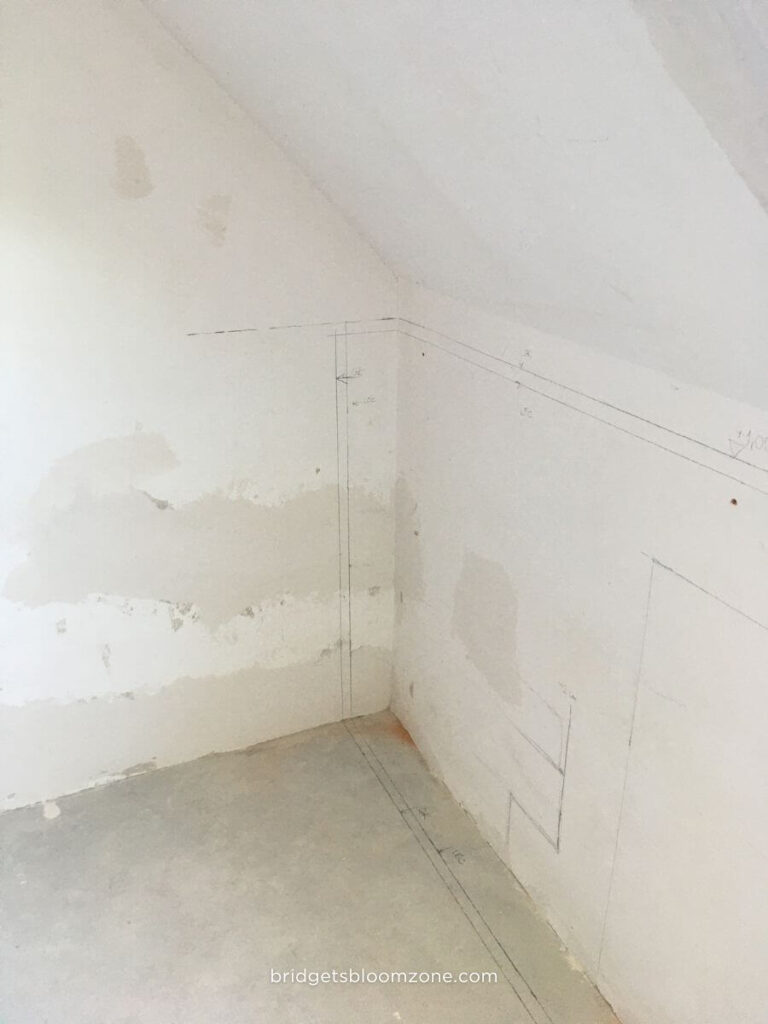
Before cutting anything, I measured everything. Twice. Built the 3D model in my computer. Cut out the niche out of cardboard… draw on the wall… to compare the size in reality.
When building a DIY bedside table niche, you need to define:
- What will it hold?
- How deep should it be?
- At what height does it feel natural next to the mattress?
- Do you want hidden functions (lights, switch, outlets)?
- Will it include niche shelves later?
Because this isn’t just decoration. It replaces a functional nightstand.

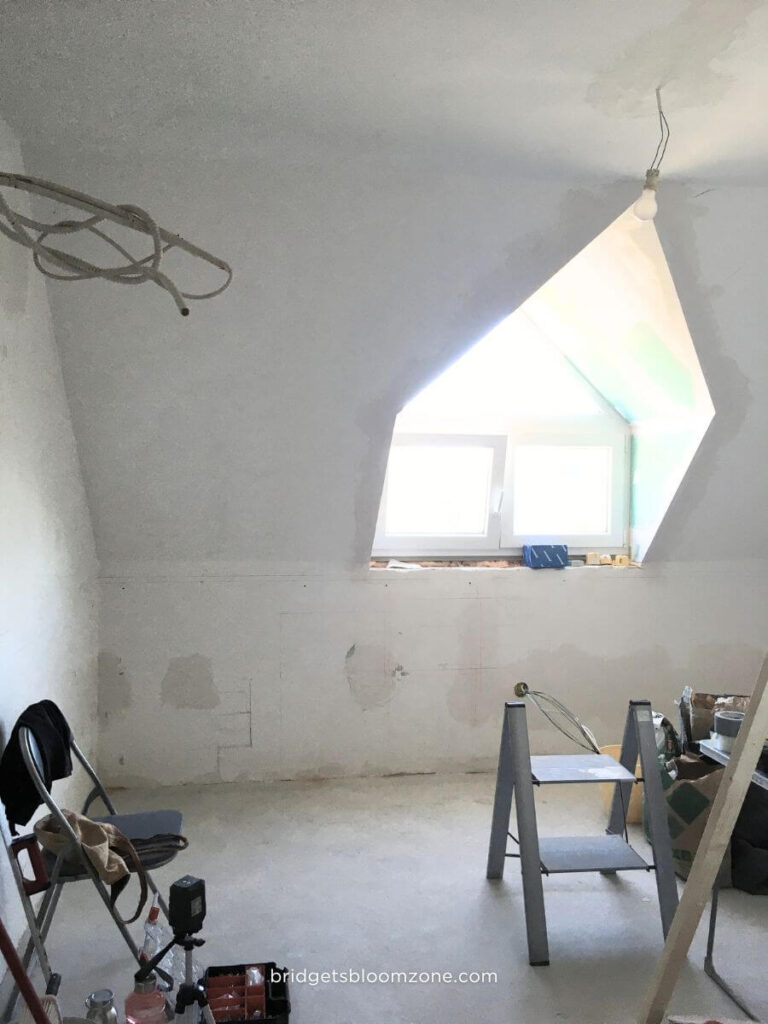
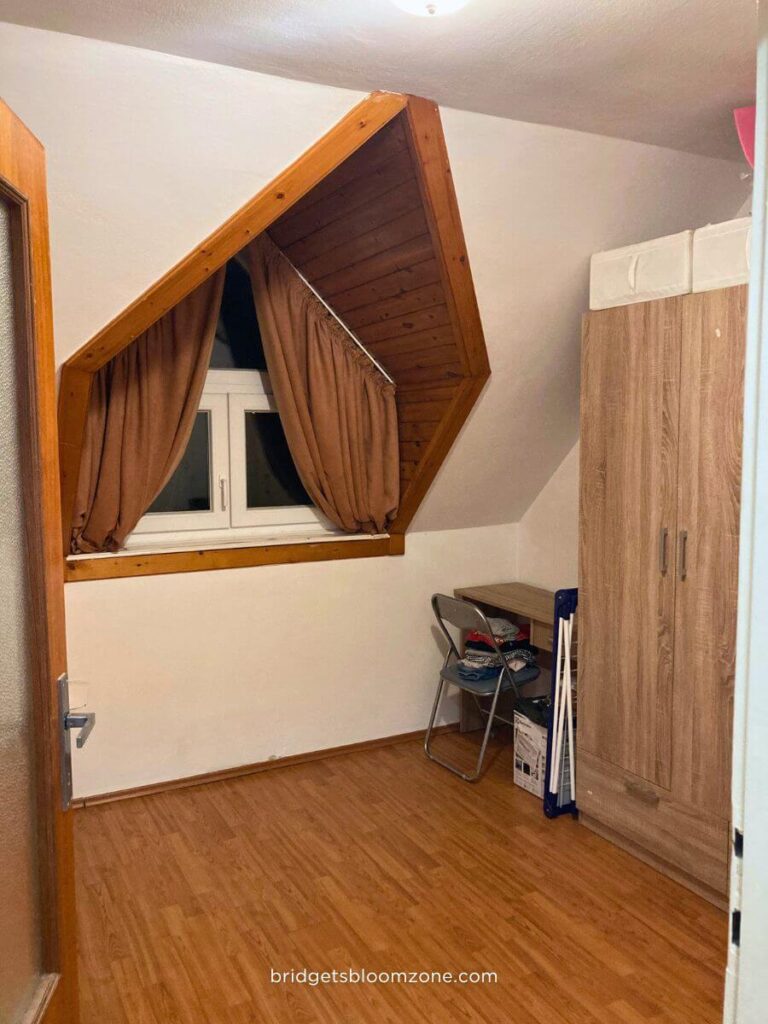
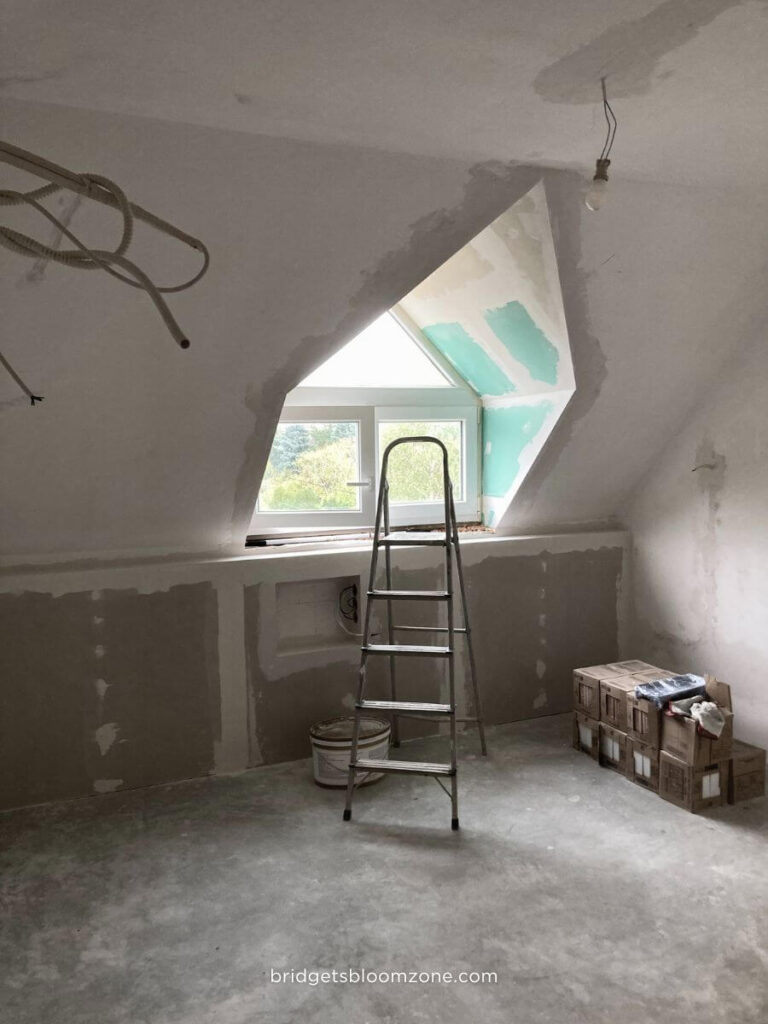
This is where the service wall will be built with the niche We draw the structure on the wall… It will be painted afterwards. This is the original look of the small window.
Our Design Decisions
- Height aligned with mattress top
- Deep enough for a mobile phone + glass of water
- Side space for hidden switch and two outlets
- Future wooden shelf insert
- Clean external corner detail
- Repeating the shape of the window over it
I also designed the wooden structure in advance, calculating the exact internal opening size so that finishing layers wouldn’t “eat” more millimeters than expected.
Millimeters matter. Especially when you’re building drywall shelves inside a 10-something square meter studio.
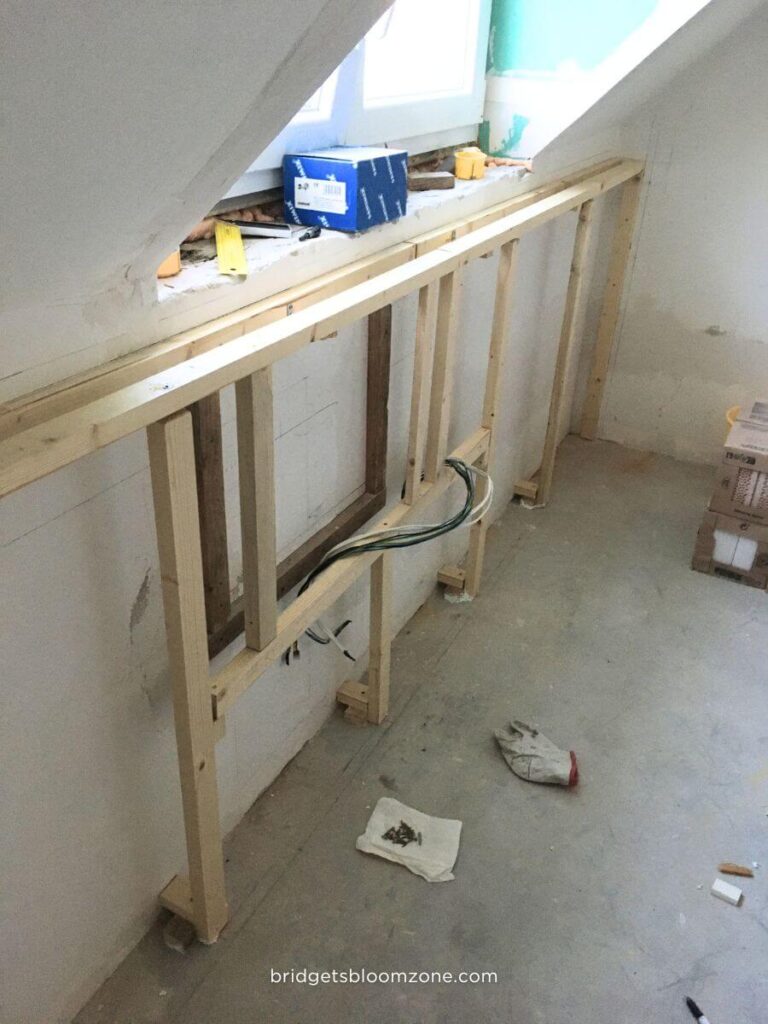
DIY Bedside Table — Building the Structure
We built the core structure in one intensive day and managed to finish all the gypsum works with my fiancé. Well, everyone has an idea of a romantic Saturday.
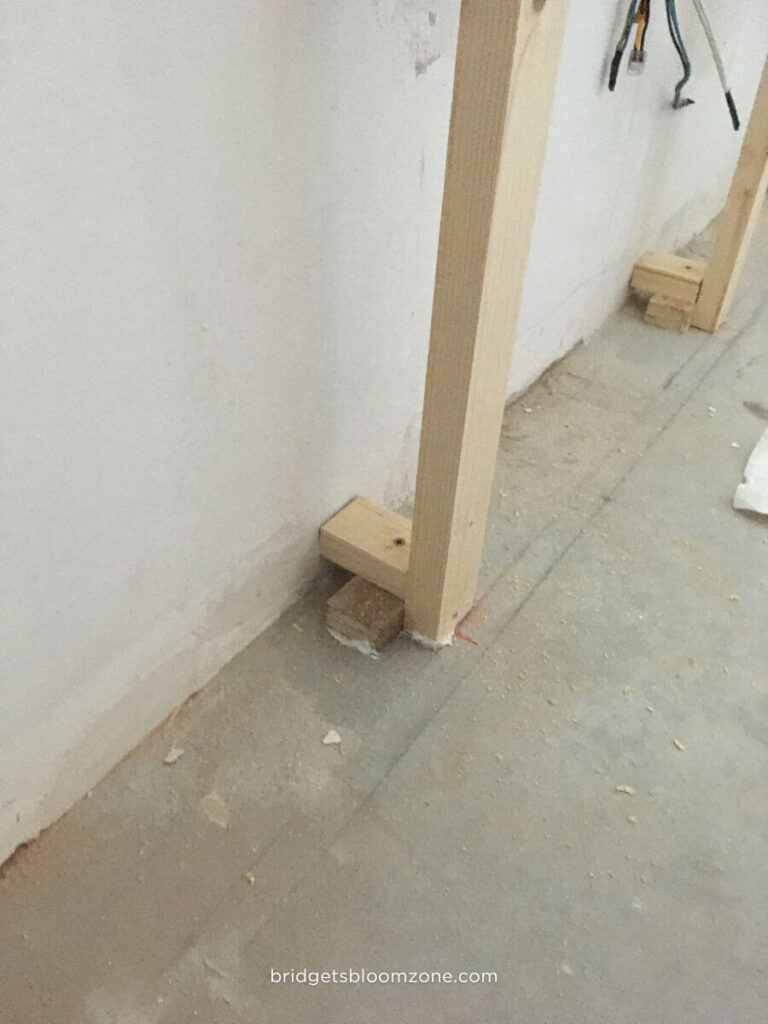
Step 1 — Cutting the Wooden Frame
We used approximately 3×4 cm (approx. 1.2 x 1.6 inches) wooden battens (structural framing pieces).
Everything was cut in advance according to the plan.
The wooden structure was:
- Glued to the concrete floor with strong construction adhesive (did not want to drill the pavement)
- Anchored to the wall with screws
This part is crucial: the stability of your DIY bedside table depends entirely on this hidden skeleton.
If the base is rigid, everything else becomes easy.
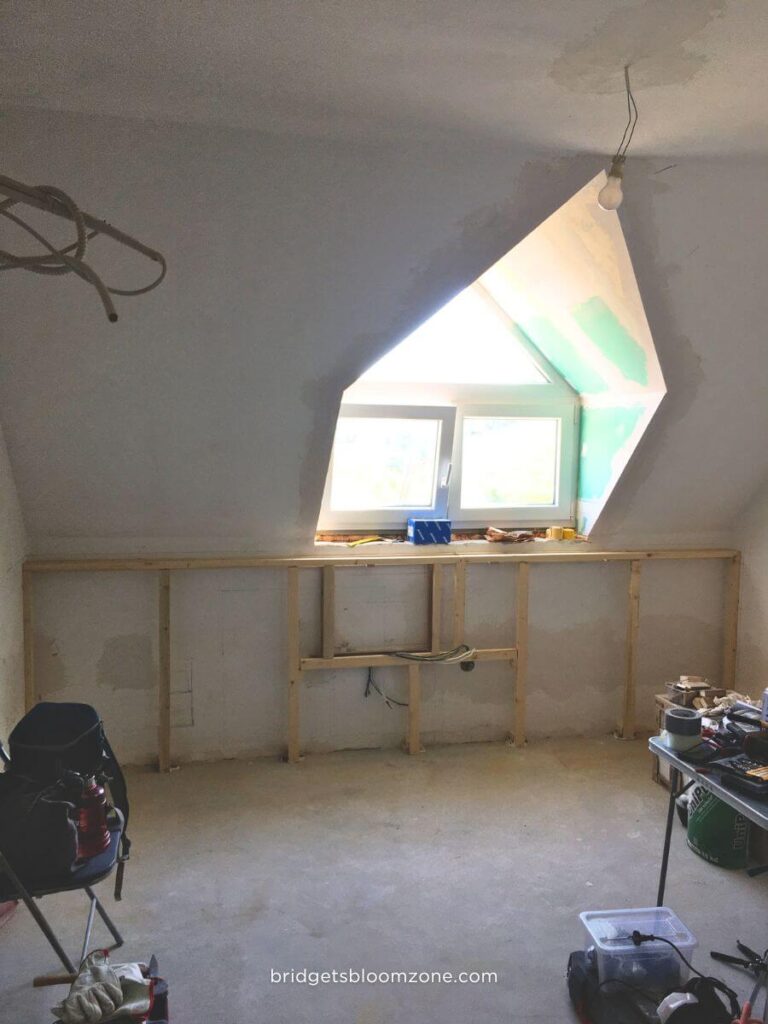
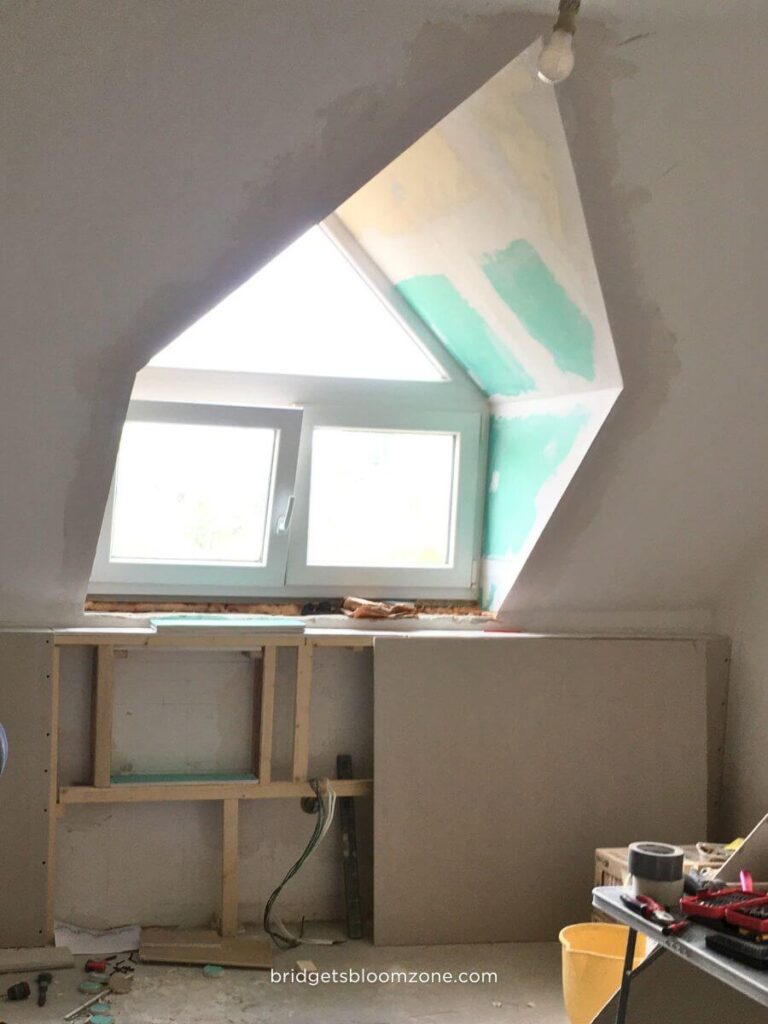
Step 2 — Installing the Gypsum Board
We built the wall using two layers of 12,5 mm (0,5 inch) thick gypsum boards.
Mostly standard boards, plus some leftover water-resistant pieces (because renovation leftovers always find a purpose).
Two layers give:
- Better rigidity
- Cleaner edges
- Stronger surface for future shelf load
If you watch most YouTube tutorials, they’ll tell you that one layer of drywall is enough. Sometimes it could be enough, but 2 layer means more stability. As we will place the bed right next to it, we played it safe.
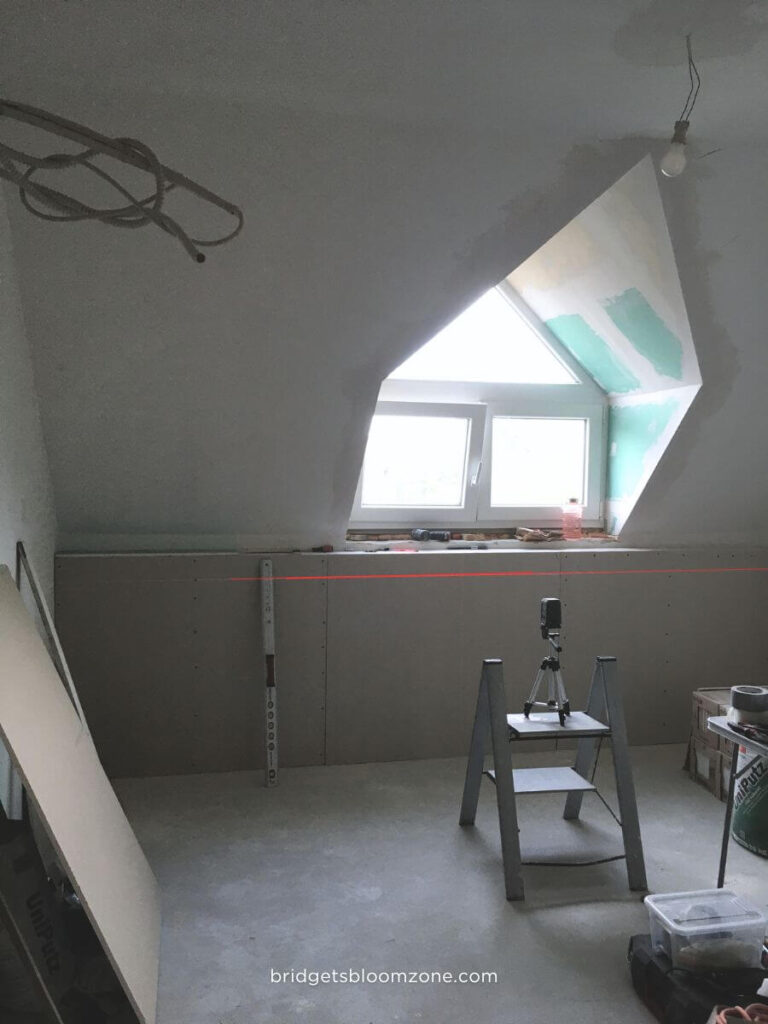
We fixed the boards onto the wooden structure, carefully marking the niche opening beforehand.
Then came the delicate part: cutting out the bedroom niche itself.
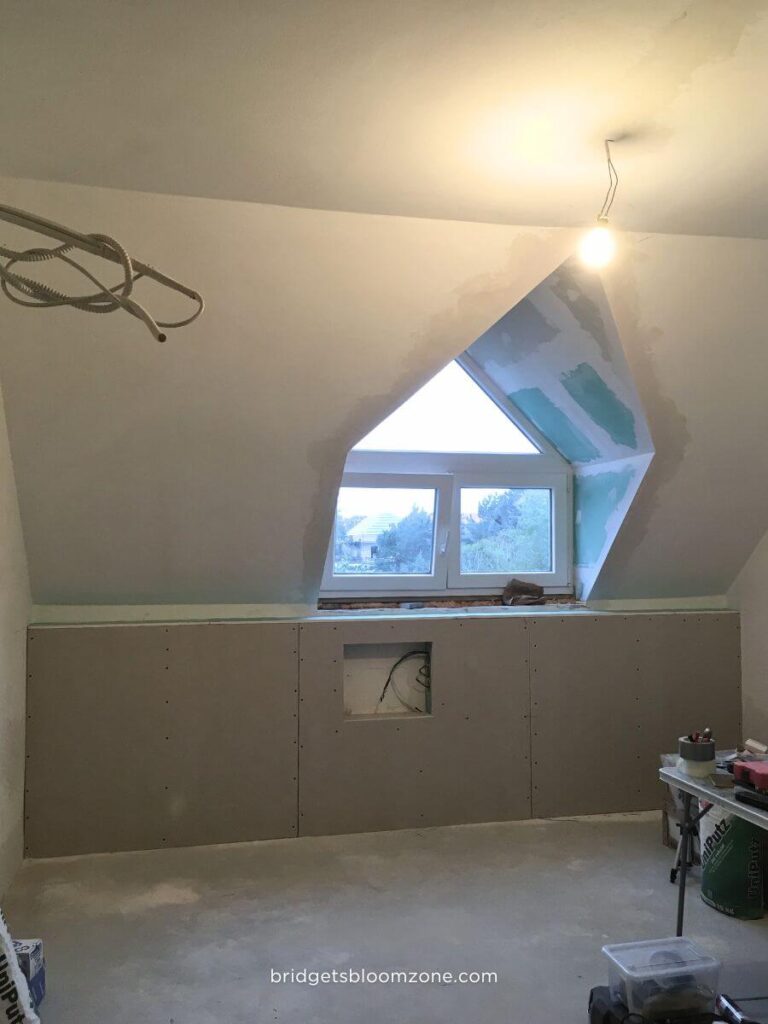
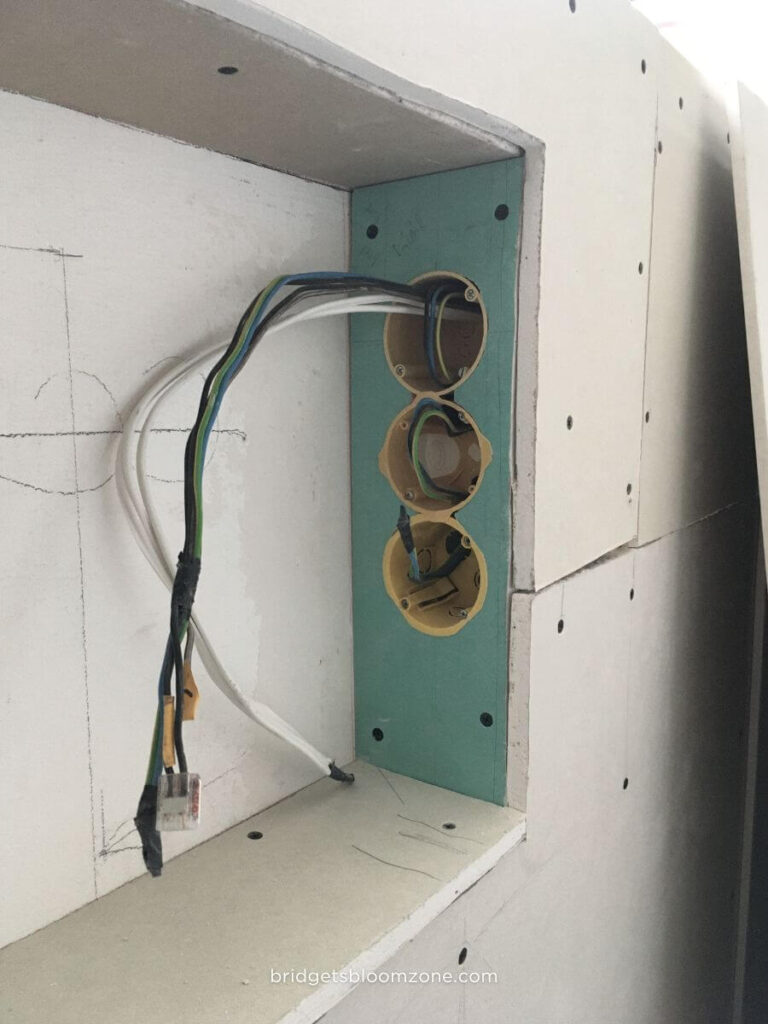
The Electrical Challenge Inside the DIY Bedside Table
Here’s where things became interesting.
I wanted:
- 1 light switch
- 2 outlets
- All hidden inside the niche box
Why?
Because when you enter the room, I didn’t want visible switches interrupting the wall composition. The niche side panel became the perfect location.
However.
I made a mistake.
Forgot to buy the proper triple drywall electrical box.
Instead, I had three separate single boxes.
Which meant… improvisation. Don’t do this!
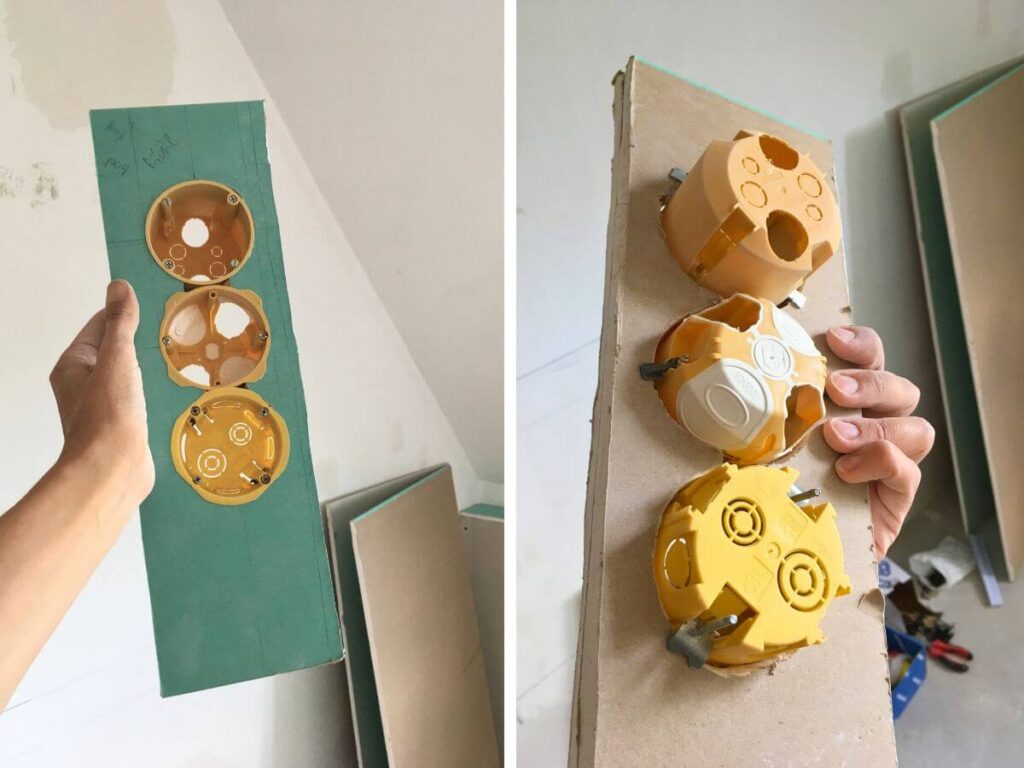
It required much more precise carving into the drywall than planned. More dust. More patience. Slightly more stress. 5x more time…
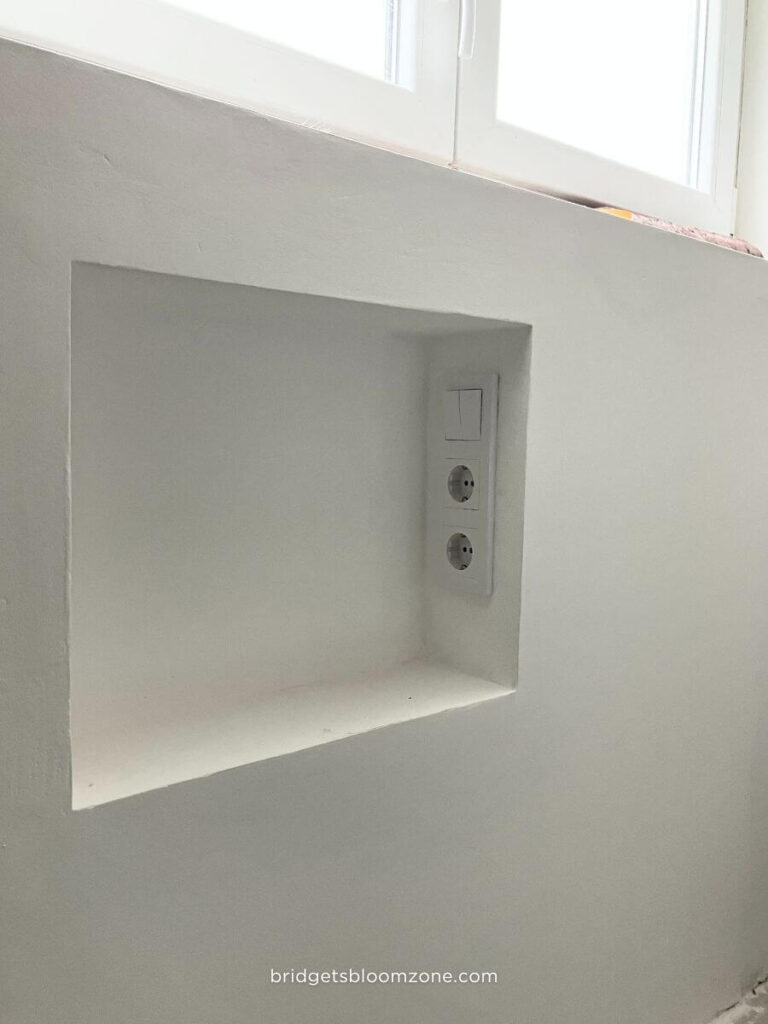
But in the end?
The switch and both outlets were installed cleanly and securely.
Architect lesson: always check the electrical hardware list twice. Be patient or go back to the shop to buy the proper product.
Finishing the DIY Bedside Table — Seams and Corners
Once the structure was complete and electricity installed, we moved to finishing.
Joint Tape
We applied self-adhesive joint tape on all plasterboard seams.
Clean seams are non-negotiable in a modern wall niche. Any crack later would completely destroy the minimal aesthetic.
External Corner Bead
For the outer vertical and horizontal edge, I found a surprisingly satisfying product:
A white composite paper-plastic corner bead.
This is it the Strait-Flex ORIGINAL composite drywall corner bead (or composite backing/edge protector). I do not get commission, I am amazed by its easy installation and the result.
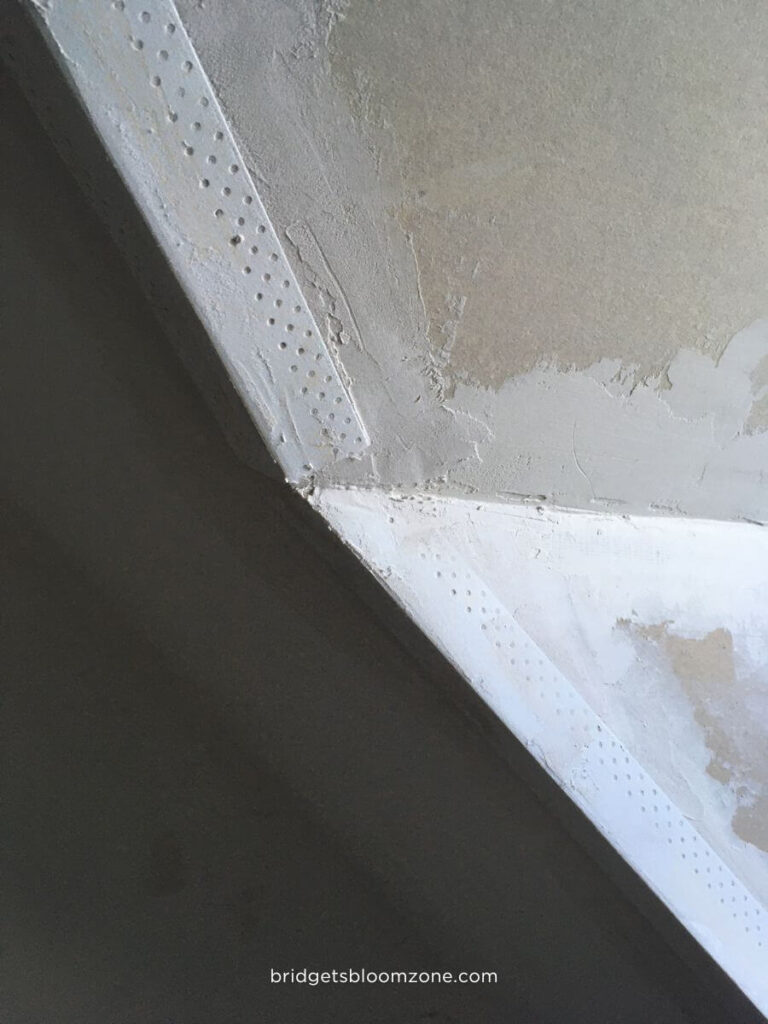
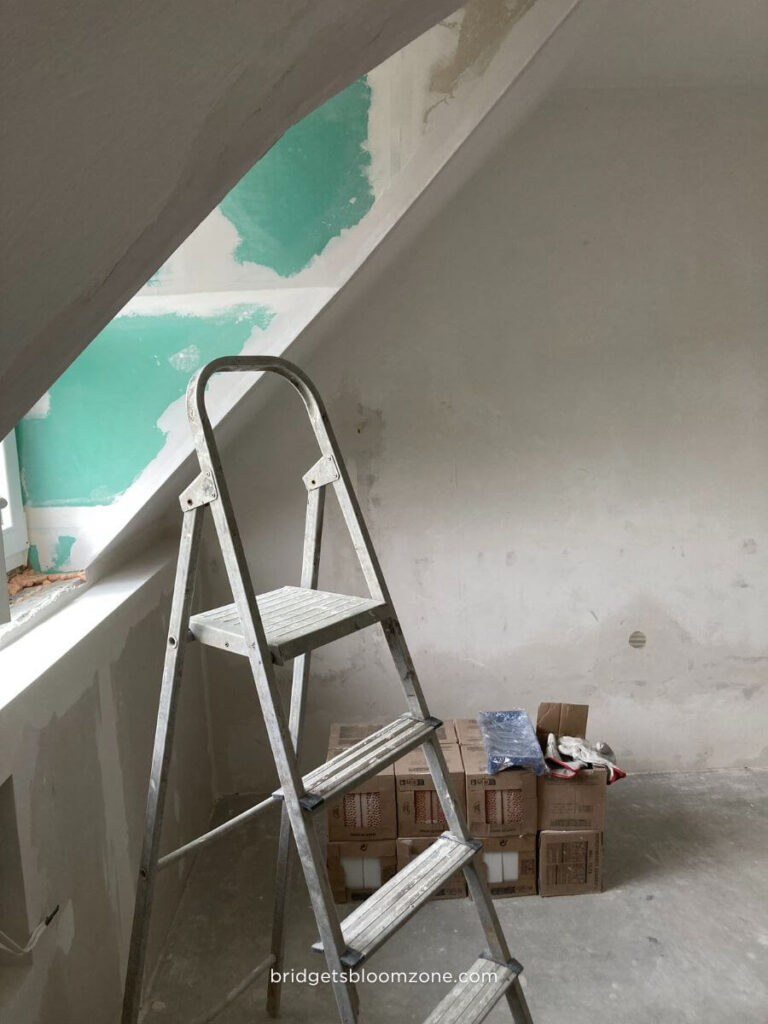
It is a high-tech, flexible tape, I also used it on the interior edges of the roof window, as those corners aren’t right angles. Its flexibility made it ideal for handling off-angles cleanly.
It claims to withstand hammer impacts.
Will I test that? Hopefully not.
But:
- It was easy to work with
- It aligned beautifully
- It created a sharp, architectural edge
Sometimes small details elevate the entire DIY bedside table from “home project” to “intentional design feature.”
Skim Coating and Painting
Next came skim coating.
Several thin layers.
Patience between drying times.
Light sanding.
Another thin layer.
Building up the surface slowly ensures:
- Seamless transitions
- No visible joints
- Perfect base for painting
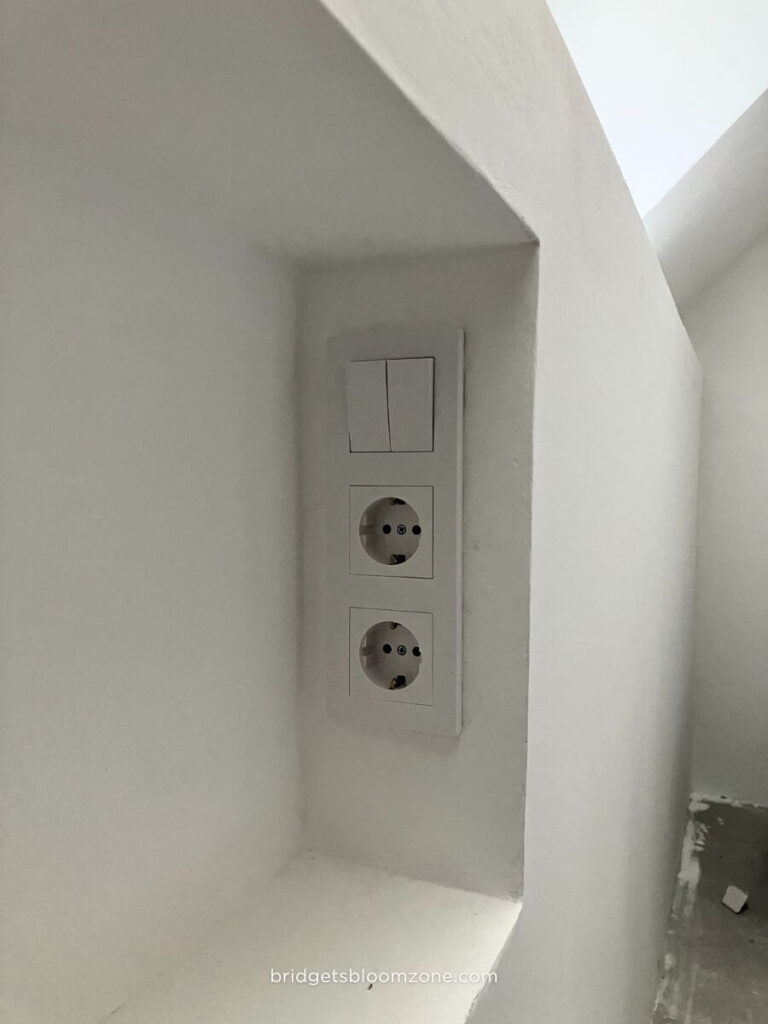
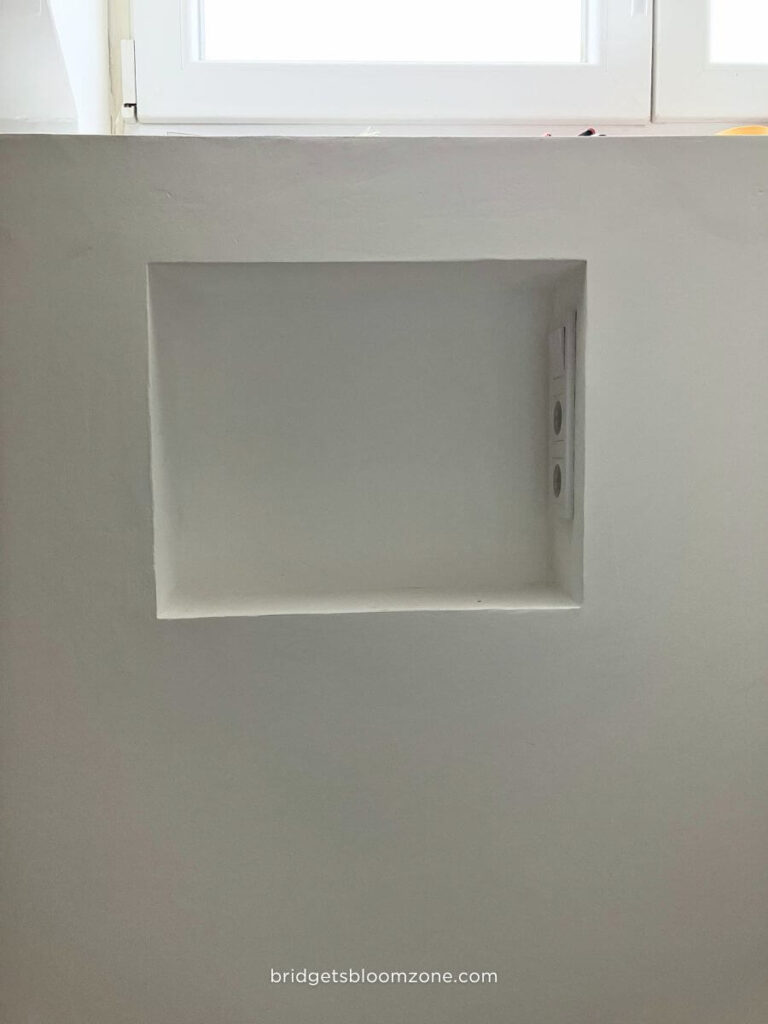
When everything dried completely, we painted the entire wall — including the niche — with the same room color. (Of course, the entire wall received a primer coat before painting.)
No contrast.
No accent color.
Why?
Because I wanted the DIY bedside table niche to feel integrated, almost carved from the wall.
A true modern wall niche.
Material Summary for our Modern Wall Niche as Diy Bedside Table
- Wooden battens (3×4 cm or 1×2 inches timber)
- Construction adhesive for fixing the wooden structure to the floor
- 2 layers of 12,5 mm gypsum board (0,5 inch board)
We used 3 boards of panel size 1200 mm x 2400 mm (4 ft x 8 ft) + leftover pieces for the niche - Joint tape
- Composite corner bead (Strait-Flex ORIGINAL, 1 full roll)
- Screws for brick wall, screws for wood, screws for gypsum board in wood (coarse-thread drywall screws, Type W)
- 1 layer of primer (Mapei Primer G)
- basic white paint (Hera Gold)
- A three-gang unit with one three-way light switch and two outlets. (From the most budget-friendly switch series by Schneider Electric, haha)
- For the future: we’re going to install a wooden shelf in the niche as well. It will sit only at the bottom, like a small ledge or sill, and one shelf of the same material will run along the entire top of the service wall.

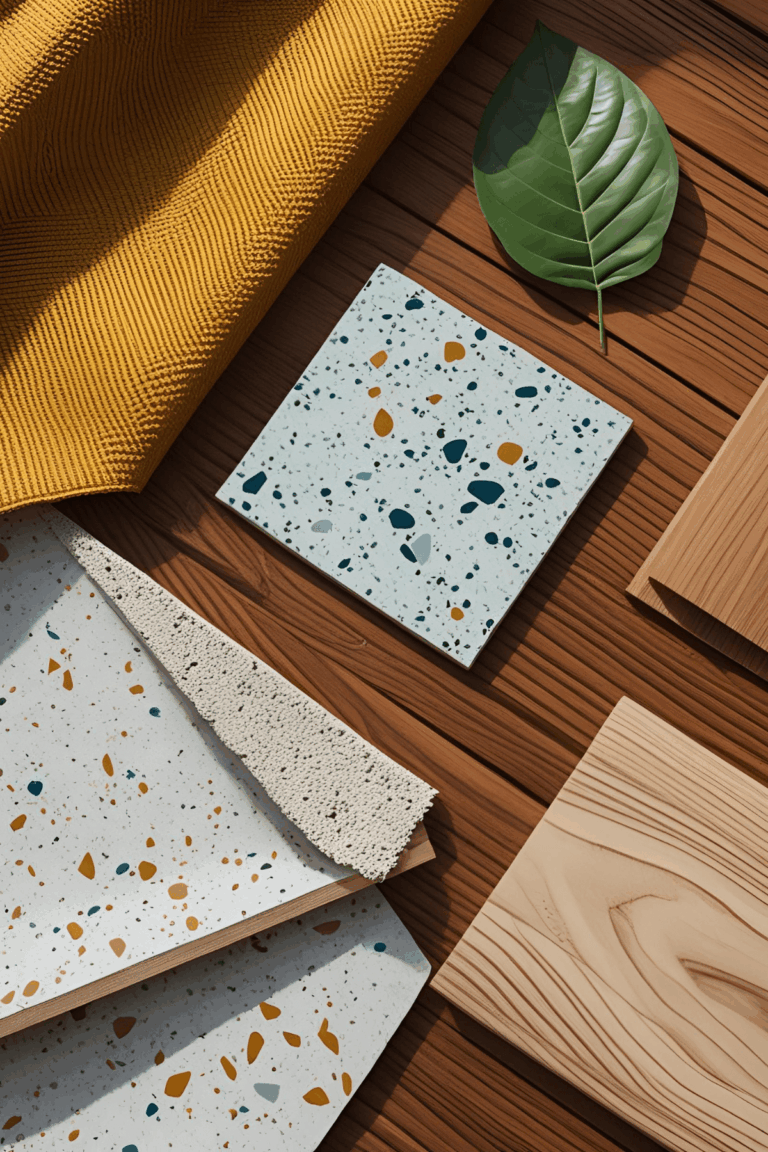
What Comes Next — The Wooden Shelf Insert
As you could have find out, he next step will be installing a wooden shelf inside the niche and another wooden surface on top of the drywall wall.
In my plan, visually, it will:
- Soften the white surface
- Add warmth
- Introduce material contrast
- Function as subtle niche shelves
- It will function as a delicate, but durable protective layer on the most frequently used surfaces.
Think minimal wooden wall shelves, but recessed.
DIY Bedside Table vs. Traditional Nightstand — Was It Worth It?
Let’s evaluate honestly.
Advantages:
- No floor clutter
- Fully integrated electrical system
- Cleaner visual line
- Custom size
- Hidden functionality
- Perfect for small studios
Disadvantages:
- More work than buying a table
- Requires drywall skills
- Permanent decision
- Taking up a lot more space of the room
Would I do it again?
Absolutely.
For small spaces, recessed wall niche ideas often outperform freestanding furniture.
How to Style a DIY Bedside Table Wall Niche
Now the fun part.
Because building drywall shelves is one thing.
Styling them is another.
As this niche functions as a nightstand, it needs:
Essentials:
- Book
- Small lamp
- Phone charging area
- Glass of water space
Decorative Possibilities:
- Small ceramic object
- Sculptural candle holder
- Minimal framed art leaning inside
- Plant (if light allows)
- A single statement object
With shelf decor bedroom ideas, restraint is key.
A niche should not become a storage cave.
For minimalist apartments, sometimes the best “decoration” is none at all. That said, a single dried flower or an elegant perfume bottle can add a touch of charm. The wall niche itself then becomes a tiny gallery, showcasing the selected items.
Modern Wall Niche Styling Rules I Follow
- Function comes first.
- Leave negative space.
- Combine one functional + one decorative object.
- Keep cables invisible.
- Avoid overcrowding.
In small apartments, every built-in element becomes part of the architecture — not just furniture.
This DIY bedside table is not an object placed in the room.
It is the wall of the room.
Shelf Ideas for Bedroom — What Works in a Niche?
If you’re considering something similar, here are practical niche shelves ideas:
- Hidden LED strip on the upper edge
- Built-in wooden insert shelf
- Vertical divider for books
- Small recessed tray area
- Stone insert for contrast
- Matte paint inside, slightly darker shade
Because a bedroom niche can be:
- Purely functional
- Sculptural
- Or both
Building a DIY Bedside Table in One Day — Realistic Timeline
Let’s be honest.
Structure + gypsum + niche cutting + electric install = one intense day.
It was really long and took a lot of energy out of us. Particularly because I was determined to carve out each of those blasted boxes individually.
But finishing?
That happened in phases.
Because:
- Adhesive needs curing
- Joint compound needs drying
- Paint needs drying
So technically:
Built in a day.
Finished in small steps.
Still, the last step is yet to come…
What I Learned From This DIY Bedside Table Project
- Service walls are not wasted space if designed intentionally.
- Planning electrical integration early saves headaches.
- Buy the correct electrical boxes.
- That fantastic drywall corner bead makes a difference.
And most importantly:
When you’re an architect experimenting on your own home, theory becomes very real. Working on it felt a bit like being on the spot for a test.
Final Thoughts — A Small Intervention with Big Impact
This DIY bedside table may look like a small element in our studio apartment renovation diary.
But it represents something larger:
Turning constraints into design opportunities.
A plasterboard service wall became:
- Electrical solution
- Storage solution
- Visual feature
- Space-saving bedside table
And honestly?
I never thought building a DIY bedside table in the form of a modern wall niche would feel this empowering.
If you’re considering recessed wall niche ideas in your own bedroom — especially in a small space — I encourage you to explore it. It requires planning, yes. Precision, yes. Patience, absolutely.
But the result?
Architectural. Minimal. Functional. Personal.
And if you have questions about designing a bedroom niche, drywall shelves, or integrated shelf decor bedroom ideas — ask me. You know I love discussing these details.
More renovation diary chapters are coming soon.
Stay tuned.