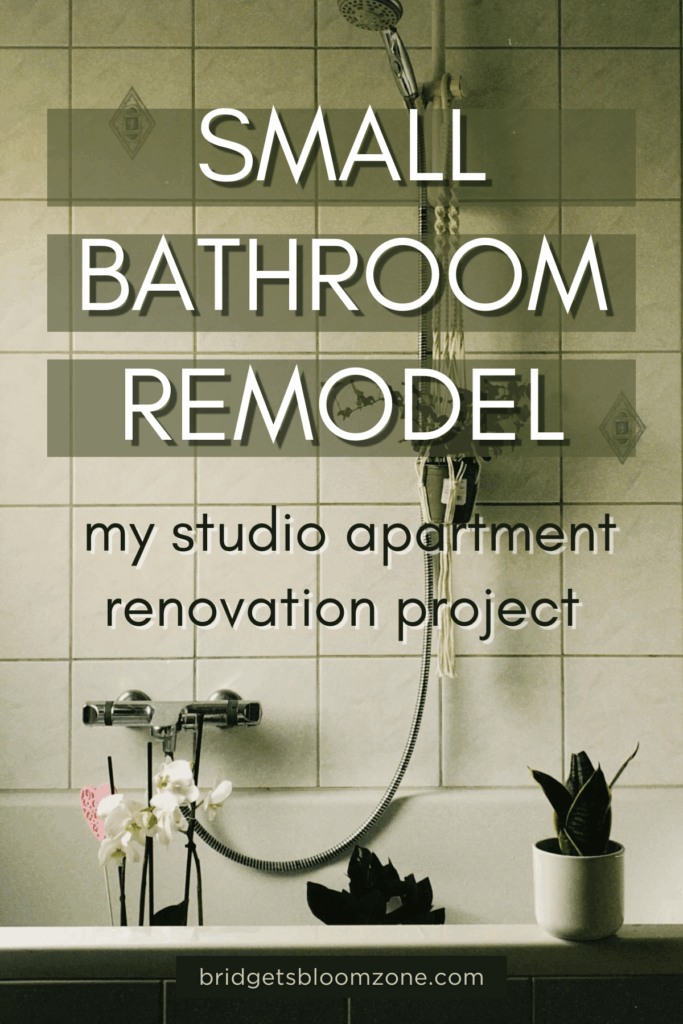
Minimalist, Small Bathroom Renovation Ideas – My Reno Diary
Got a Tiny Bathroom? Let’s Make Some Space!
Here are my minimalist tricks to consider when planning a small bathroom renovation! These smart small bathroom tricks will make your full bathroom twice as big.
Hi, I am Bridget, an architect renovating my tiny studio apartment with my fiancé (all DIY!). In this post, I’ll share the biggest lessons I’ve learned from renovating our own small bathroom — including the mistakes you should avoid, and the design choices that actually work.
If you just started to think about renovation, or are just about to decide the final tiles – Read my guide about the design rules for bathroom tile combination in small spaces!
Looking for general inspiration first? Check out my 7 minimalist small bathroom ideas for simple living — a quick guide to timeless principles. 7 minimalist small bathroom ideas for simple living
5 Things I Wish I Knew Before Starting a Small Bathroom Renovation
Designing your dream bathroom on paper is one thing. Building it efficiently — and without expensive do-overs — is another story. After weeks of demolition, mistakes, and redoing tile work, here’s what I wish I had known before starting.
I collected my small bathroom renovation ideas, how to plan a remodel that is efficient – and what MISTAKES YOU SHOULD NOT MADE!
Mistake #1: Starting Without a Plan
As an architect, I usually design floorplans and build 3D models for clients where every detail is calculated. But when it came to my own small bathroom renovation, I thought: “It’s just a tiny bathroom, I know what I want. No need for 3D modeling.”
Wrong. Without a detailed plan, I forgot how each vanity, tap, and tile would fit. When construction started, I realized I had no idea where things were supposed to go. The result? Stress, wasted time, and having to redo work until I finally sat down and drew proper plans. (By the way, the layout plans and a few extra version for my studio apartment you can find here)
Lesson learned: Always plan your bathroom layout in detail. Think about every item: taps, tiles, storage, washing machine, even where outlets and lights will go. In a small space, a few centimeters make a huge difference — and future you will thank present you for planning ahead.
Mistake #2: Not Deciding the Layout Early
In the beginning, I had a general idea of how the bathroom could look. But because of the building’s structure, some pipes couldn’t be moved. Instead of finalizing the layout right away, I left things undecided.
That mistake came back to bite me: the plumbing was installed, water outlets were fixed, and suddenly our shower tap wasn’t centered anymore — it ended up awkwardly close to one wall. (Not to mention the complications around the toilet… I think I can fill up a full post about what we made wrong!)
Lesson learned: In a small bathroom renovation, you can’t leave layout decisions for later. Decide which products you’ll buy, what their sizes are, and how they fit together before plumbing begins. Sketch it, tape it out on the floor, or build a quick 3D model in a free online app. It’s the only way to avoid frustrating surprises.
Mistake #3: Ignoring Storage Early On
I thought I could “just add shelves later” or buy a mirrored cabinet above the sink. But once walls and fixtures were in, I realized I hadn’t left enough space. And in our layout, even the mirrored cabinet didn’t work — from the shower you’d see its unfinished back, which looked terrible.
I had to rethink everything and research creative bathroom storage ideas. (I share my favorites in this post on Easy & Functional Bathroom Storage Ideas For Small Spaces) In the end, I’ll probably choose a multifunctional shelf like #3 from that list, which works for small spaces.
Lesson learned: Storage isn’t an afterthought. Before construction, decide what you’ll need to store — towels, cleaning supplies, toiletries — and plan space for it in the layout. This is especially important if you want a wall niche, a recessed cabinet, or a wall-mounted toilet system.
Mistake #4: Trusting Specialists Without Checking Their Work
We realized tiling was taking too long, so we hired a professional tiler. I explained exactly what we wanted, assumed everything was clear, and left him to work.
Two days later, something felt off. Half the bathroom was tiled, but something wasn’t right. On day three I checked closely: he had skipped the waterproofing, and none of the tiles lined up straight. His job ended there. We tore everything down, corrected the walls, and bought new tiles. It was an expensive lesson.
Lesson learned: In any small bathroom renovation, you are the project manager. Write down exactly what needs to be done, and agree with your specialist that you’ll check each stage before they continue. Be consistent and persistent — it’s your bathroom, and mistakes will cost you later.
Mistake #5: Underestimating the Workload
We thought the process would be simple: demolish, plaster, waterproof, then tile. Easy, right?
Not even close. Every big milestone came with dozens of smaller tasks: pipe adjustments, measurements, missing materials, painting doors, carrying away waste. Each step took far longer than we expected. And because we don’t have years of renovation experience, we worked much slower than professionals.
Lesson learned: Don’t assume a small bathroom renovation will be quick. Be patient and plan extra time between each stage — especially if multiple specialists are involved. One delay will push everything else back. Build that buffer into your schedule, and you’ll avoid disappointment.
3 Bonus Mistakes People Often Make in a Small Bathroom Renovation
And since we’ve already made enough mistakes to warn you about, here are 3 bonus mistakes that many people make in a small bathroom renovation — things you’ll want to avoid from the very beginning.
Mistake #6: Forgetting to Budget for Hidden Costs
When you start tearing down walls in a bathroom, you always find surprises — uneven walls, old pipes, moisture damage. Even in a tiny bathroom, the costs add up quickly. Many people (including me!) underestimate how much a small bathroom renovation actually costs, because the space is small.
Lesson learned: Always add at least 15–20% to your renovation budget for unexpected repairs. It’s much less stressful when you’re prepared.
Mistake #7: Skipping Ventilation
It’s easy to focus only on tiles and fixtures, but poor ventilation in a small bathroom means mold and constant dampness. In small apartments, there’s often no window, so the fan is the only solution. If you don’t plan for it early, you’ll regret it later.
Lesson learned: Always include ventilation in your design. Whether it’s a good exhaust fan, a window strategy, or both, plan it before you finish the walls. Side note: it probably will need electricity!
Mistake #8: Poor Lighting Choices
In a small bathroom, a single ceiling light makes the room feel dark and smaller. What you really need is layered lighting: general, task, and maybe even accent lighting. I love lights, so I have a proper vision of what to do exactly – I will share everything after it is done and visible!
Lesson learned: Don’t underestimate lighting design. Add mirror lights for daily routines, soft ceiling light for overall brightness, and if possible, a small accent light to make the space feel cozy and stylish.
7 Small Bathroom Renovation Ideas to Make a Minimalist Full Bathroom
After you learned from our mistakes, here are the conclusion, that allows you to have a small bathroom renovation in a flow! All of these are tested in some bathrooms I have designed earlier, but enriched with my experiences that can make your plan even better!
Small bathrooms challenge everything — layout, storage, aesthetics, hygiene. But when you think minimalist, not boring — it gets exciting. These 7 minimalist small bathroom ideas are not only beautiful, but actually doable AND budget friendly, especially if you’re designing from scratch.
Here’s what I chose, but here’s how you can adapt it.
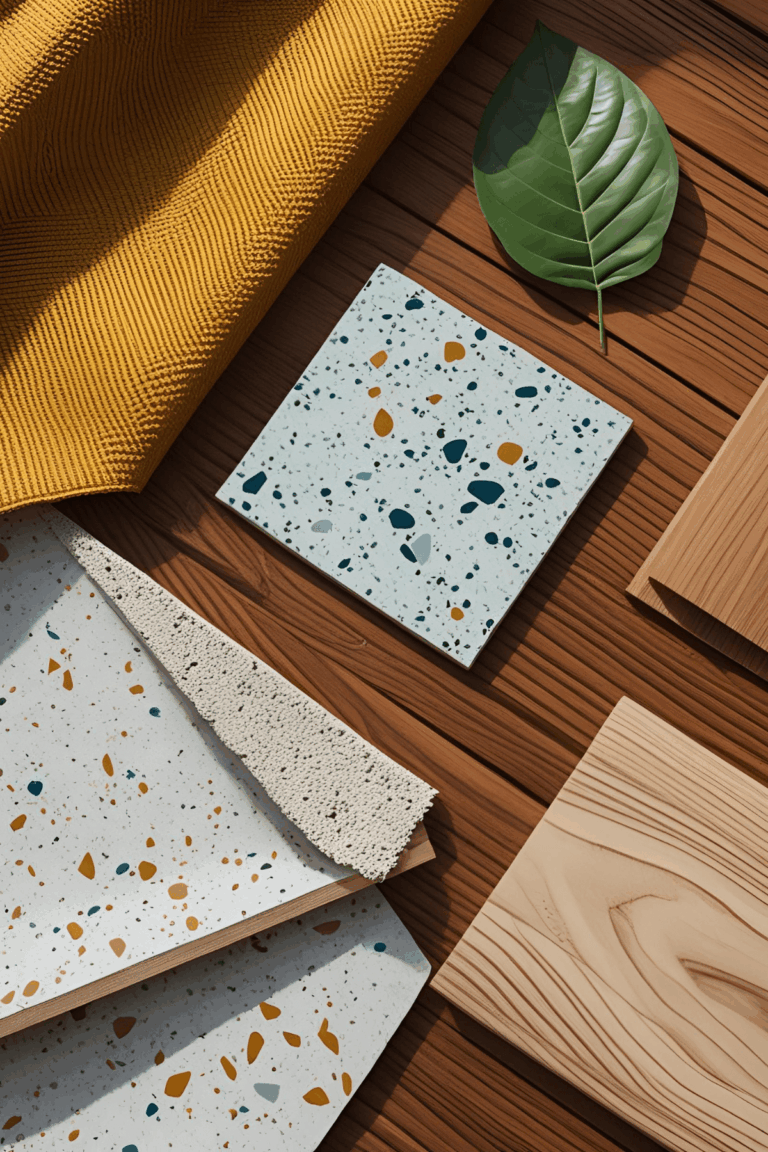
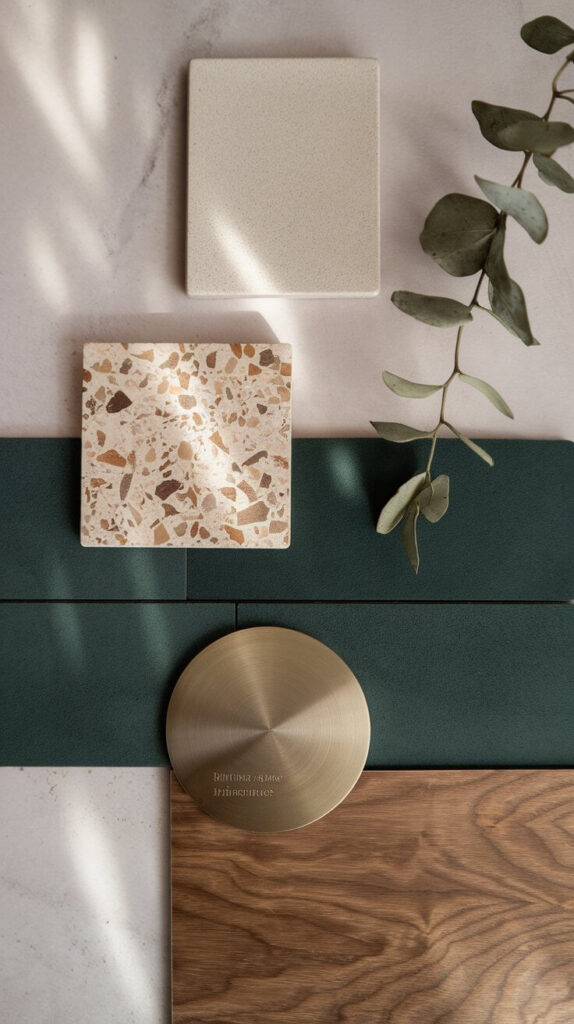
1. Materials: Invest in Quality, Even in Small Spaces
In a very small bathroom renovation, you don’t need as many square meters of tile or wood — which means you can often afford higher-quality finishes without blowing the budget.
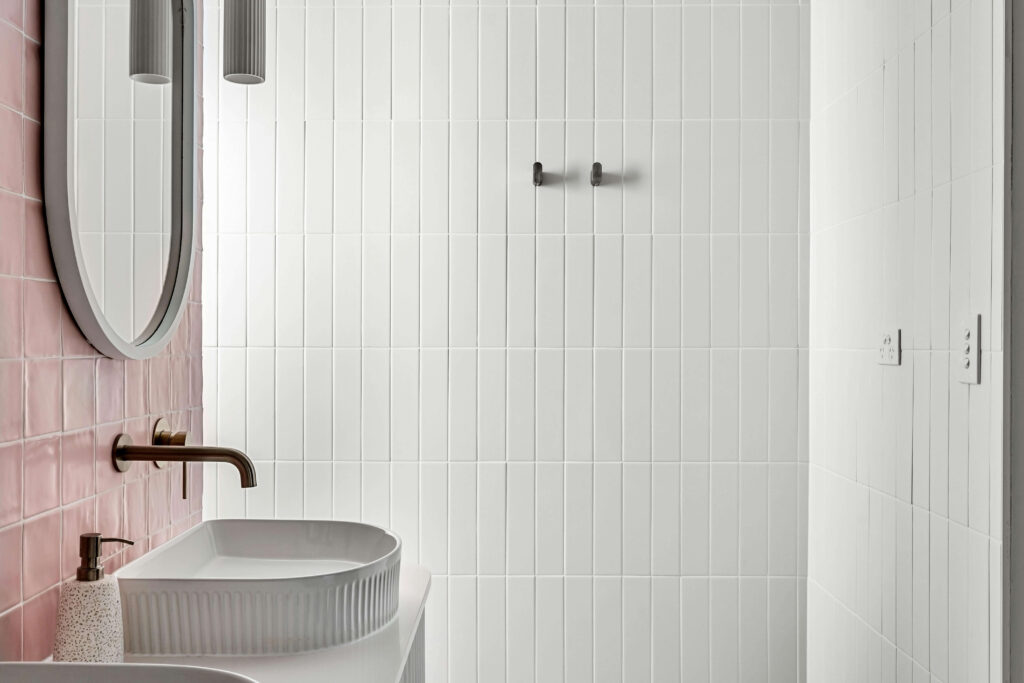
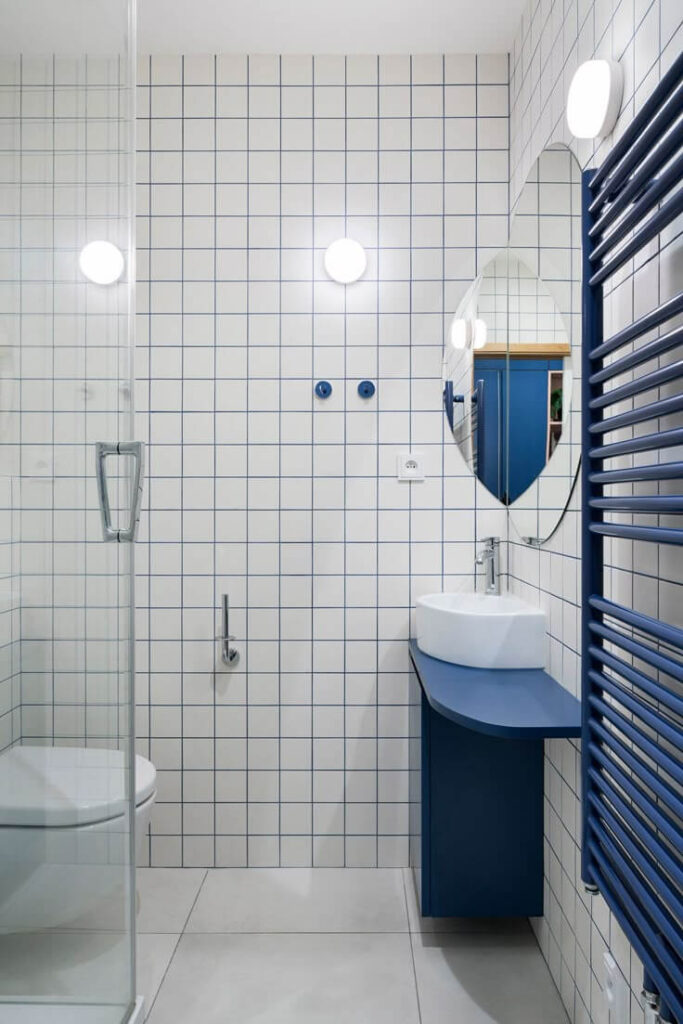
What I chose: I wanted something modern and playful, so I went for white subway tiles with blue grout on the walls, paired with terrazzo flooring and wooden furniture. The blue grout adds a “funny” touch that fits our vision of smart, funny, cozy, minimal.
How you can adapt it:
- For a timeless look: stick with light tile colors, grout in matching color, and larger tiles (fewer joints = easier cleaning).
- For a bold style: try colorful grout, patterned terrazzo, or even natural stone accents.
For budget-friendly minimalism: use simple ceramic tiles but invest in one standout detail, like a wood vanity or brass fixtures.
2. Lighting: Layer It, Don’t Skimp
When you’re planning a small bathroom renovation, lighting is often an afterthought — but it really shouldn’t be. Did you know the average person spends about two years of their life in the bathroom? From brushing your teeth to late-night trips, every situation needs its own kind of light.
What I chose:
Our bathroom came with a central ceiling lamp, so I kept its position. But I didn’t want a single, blinding light that makes the space feel flat. Instead, I layered three different kinds of lighting:
- Main light: the central lamp, simple and functional.
- Task light: a “theater mirror” style around the vanity for makeup and grooming (trust me, this makes a huge difference!).
- Accent light: a soft underlight beneath our floating sink — perfect for night visits without waking up completely.
We also decided on a warmer light spectrum (2700–3500K). Since our bathroom palette is white and blue, I wanted to avoid a cold, sterile vibe. Warmer tones balance the blues and make the space cozy instead of rigid.
How you can adapt it:
- If you love a sleek minimalist look → go with hidden LED strips under shelves or around mirrors.
- If you want a spa-like feel → use dimmable lights and natural daylight bulbs near the shower.
- If you’re on a budget → install one strong central light, then add inexpensive stick-on LED pucks near the mirror or toilet for extra functionality.
Pro tip: Always think about your bathroom in “zones” (main space, vanity, shower, toilet). If each zone has its own light, your bathroom will not only look bigger but also feel much more comfortable.
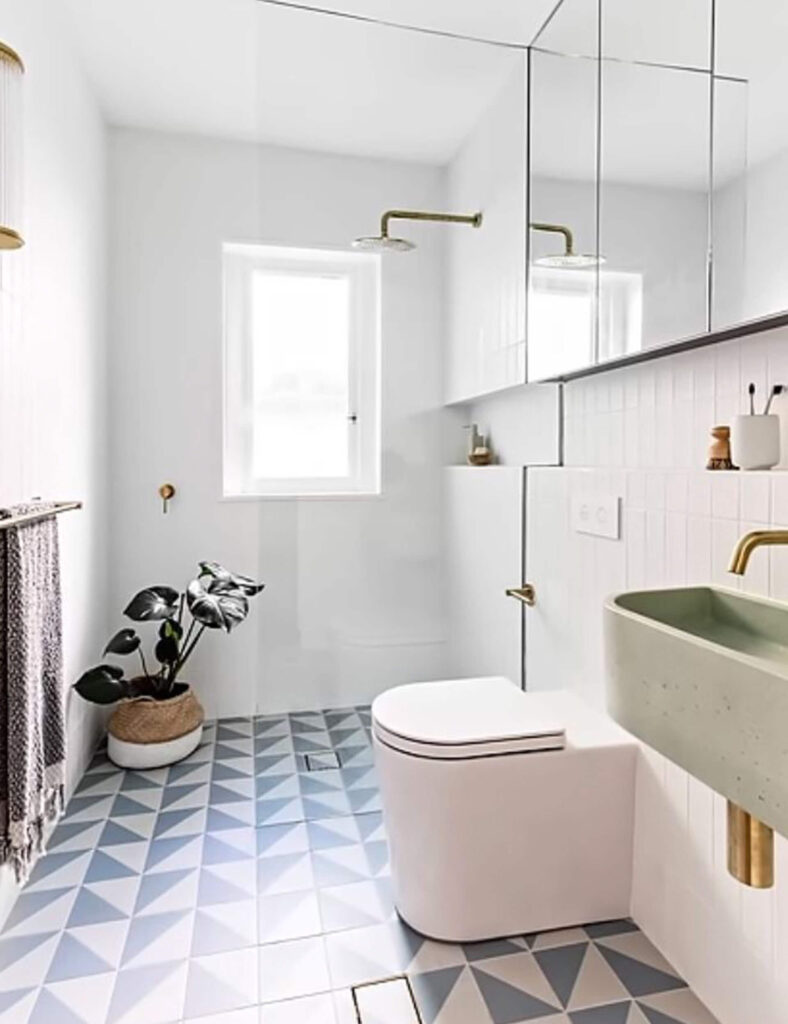
3. Colors: Go for Light but Dare to Be Bold
Choosing colors in a small bathroom renovation can feel risky. Many people stick with safe whites and neutrals, but sometimes a bold choice can make a space more memorable.
What I chose:
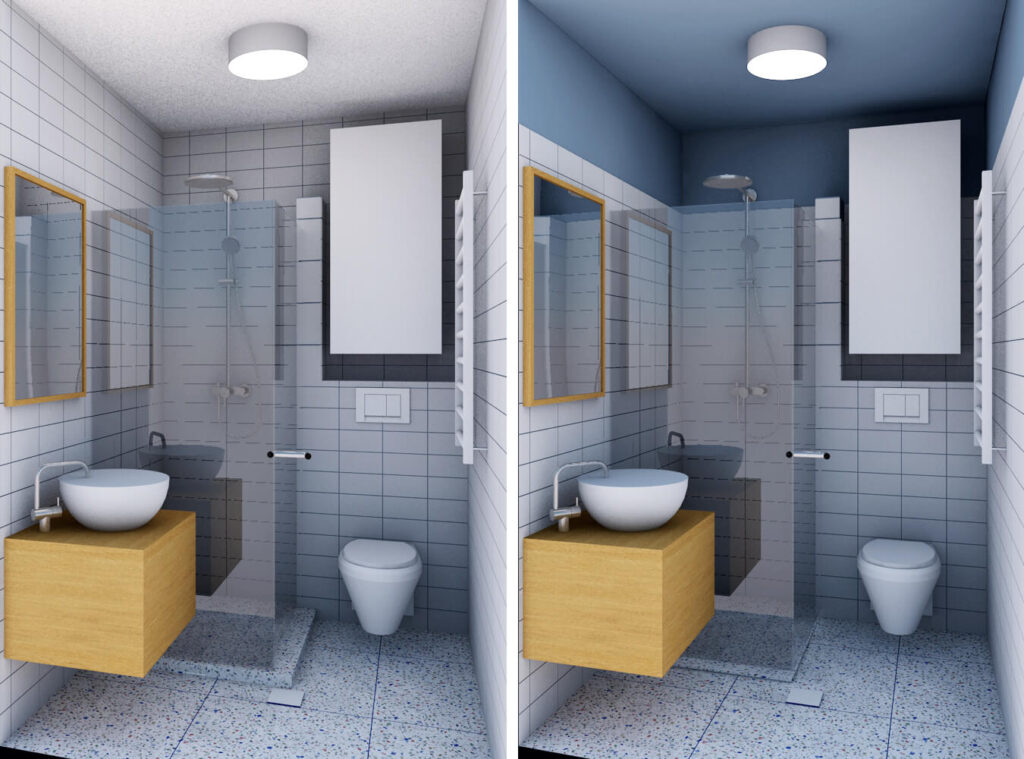
Our palette was white tiles + terrazzo with tiny blue stones. To keep things playful, I decided to paint the ceiling blue, matching the grout. I know, I know — darker ceilings usually scare people, but with my renderings I could see it actually made the room feel wider and more exciting.
There are some unwritten design rules, how to find the best tiles for small bathrooms. Since this apartment will be a short-term rental, I wanted a bathroom that feels extraordinary for guests.
How you can adapt it:
- If you want timeless minimalism → stick with soft neutrals like whites, beiges, or pale gray.
- If you want personality without overpowering → try a pastel tiles or a single bold accent wall.
- If you love bold choices → paint the ceiling, use colorful grout, or even experiment with wallpaper on one wall (yes, waterproof options exist!).
Pro tip: In small bathrooms, consistency matters. Keep most of the surfaces simple, then add one accent color — it will feel intentional, not chaotic. Thinking about grout color – don’t choose white, unless you have a steam cleaner and you love to clean.
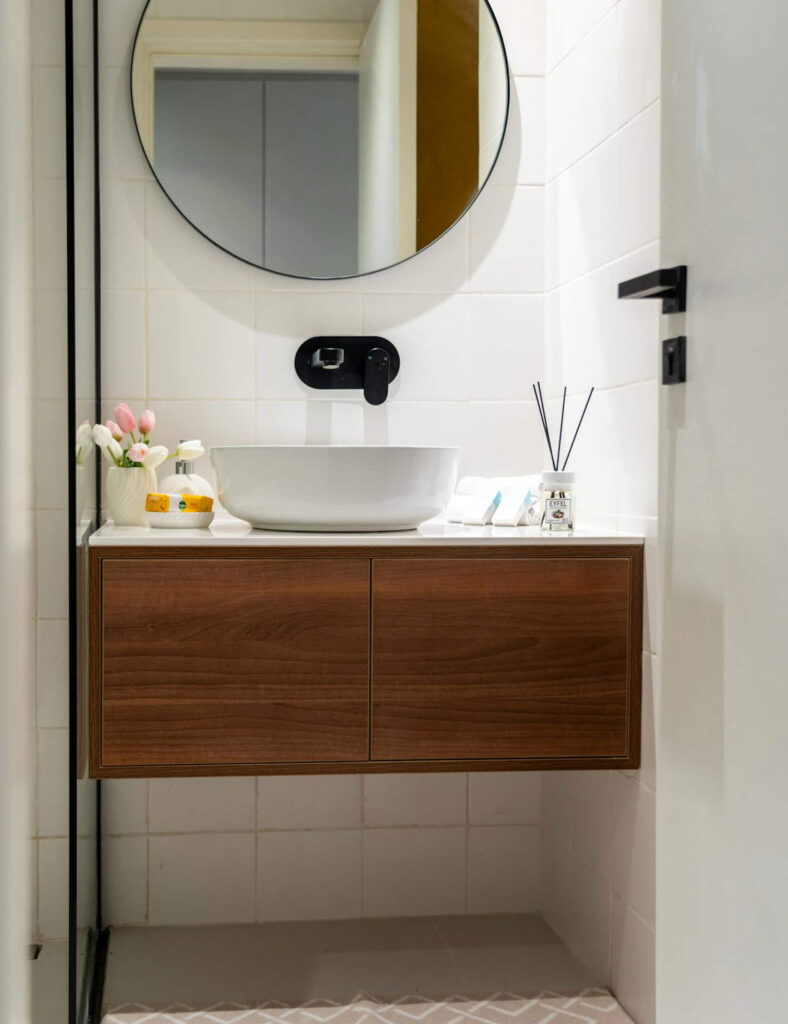
4. Mirrors: Double the Space
Mirrors are the oldest trick in the book when it comes to small bathroom renovation ideas — but that’s because they really work. They bounce light, visually double the space, and add character.
What I chose:
Because of the pipe layout, our sink + mirror area ended up being smaller than I first imagined. Instead of a huge wall mirror, I’m considering a framed mirror — either wood or a bold color — to keep the playful vibe. And of course, lights around the mirror for the best reflection (and for our lady guests!).
How you can adapt it:
- For maximum space illusion → go frameless and oversized, stretching the mirror across a whole wall.
- For hidden storage → choose a mirror cabinet to tuck away toiletries (ideal if you have limited shelves).
- For design impact → use a framed mirror in wood, black, or even a pop of color to make it a centerpiece.
Pro tip: Place mirrors opposite natural light (if you’re lucky enough to have a window), or next to your brightest artificial light to maximize brightness.
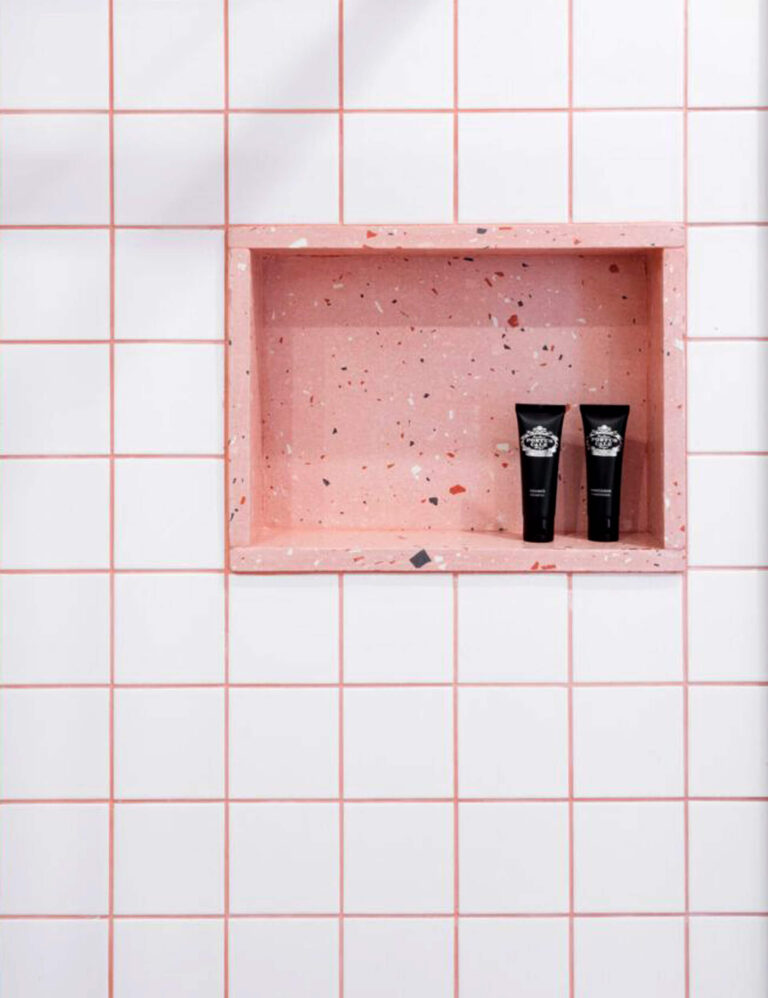
5. Storage: Plan It Early
Storage is where many small bathroom renovations fail. If you don’t plan it before tiling, you’ll end up trying to squeeze in shelves or buying last-minute cabinets that don’t fit.
What I chose:
Since this is a short-term rental, we don’t need endless storage. I planned a drawer under the sink and one slim shelf near the door. Originally, I thought I’d just add something later — but space ran out quickly, and the mirrored cabinet idea didn’t work (I think I already told you why).
I have something very specific in my mind. Like these ideas:
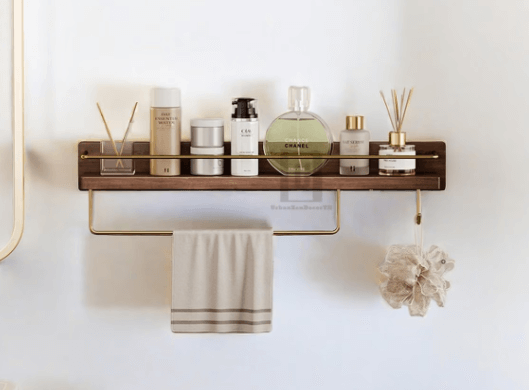
How you can adapt it:
- For daily living → plan niches in your shower wall, or add vertical storage above the toilet.
- For renters/short-term stays → floating drawers or slim ladder shelves may be enough.
- For ultra-minimalists → I consider myself for ultra-minimalist – I guess we don’t have much things to store, so some basic hooks will do it.
Pro tip: Make a list of what you actually need to store (towels, toiletries, cleaning products) before planning your layout. That way, storage feels built-in, not added later.
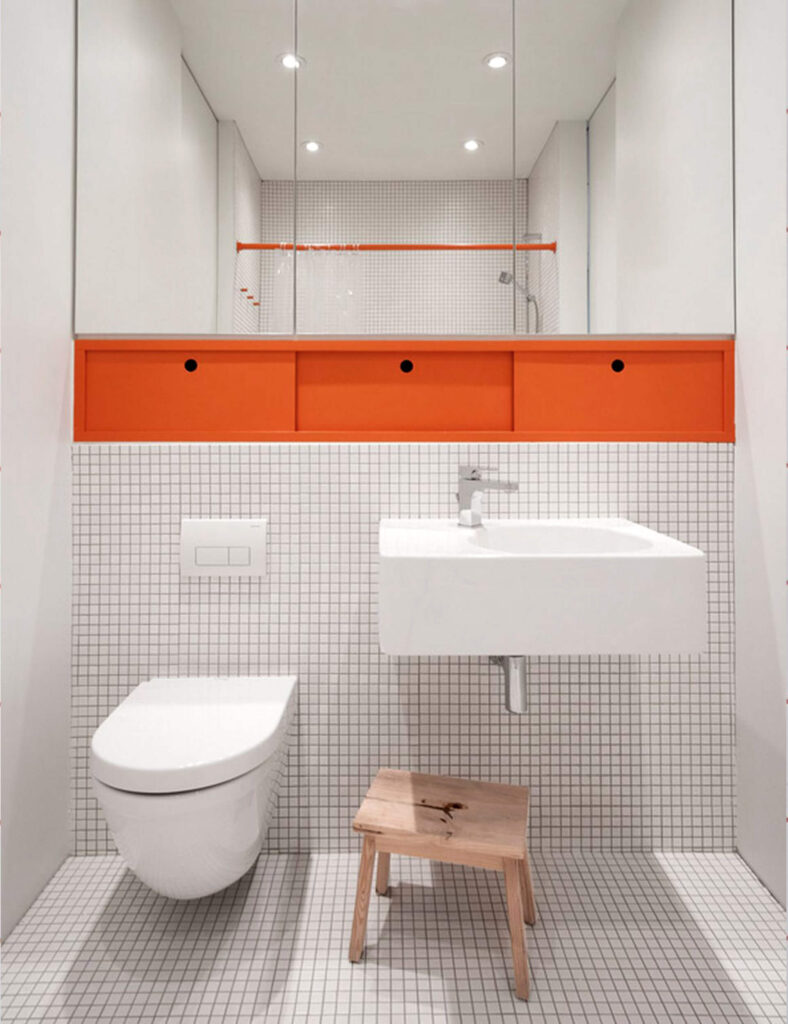
6. Floating Fixtures: A Minimalist’s Best Trick
If you want your tiny bathroom to feel bigger, floating fixtures are a game-changer. Wall-mounted sinks, toilets, and shelves free up visible floor space, which makes the room appear twice as large.
What I chose:
I went all-in with floating: sink, toilet, shelves, toilet paper holder, towel dryer, even the bin and brush. Why? Because the more floor you can see, the more spacious it feels. And yes, it’s easier to clean too!
How you can adapt it:
- If you want maximum space illusion → choose wall-hung toilets and vanities.
- If your budget is tight → even just one floating element (like the vanity or shelves) can make a big difference.
- If you’re renting → use “floating-look” furniture with slim legs instead of heavy block pieces.
Pro tip: Combine floating furniture with underlighting (like I did under the sink) — it doubles the airy effect.
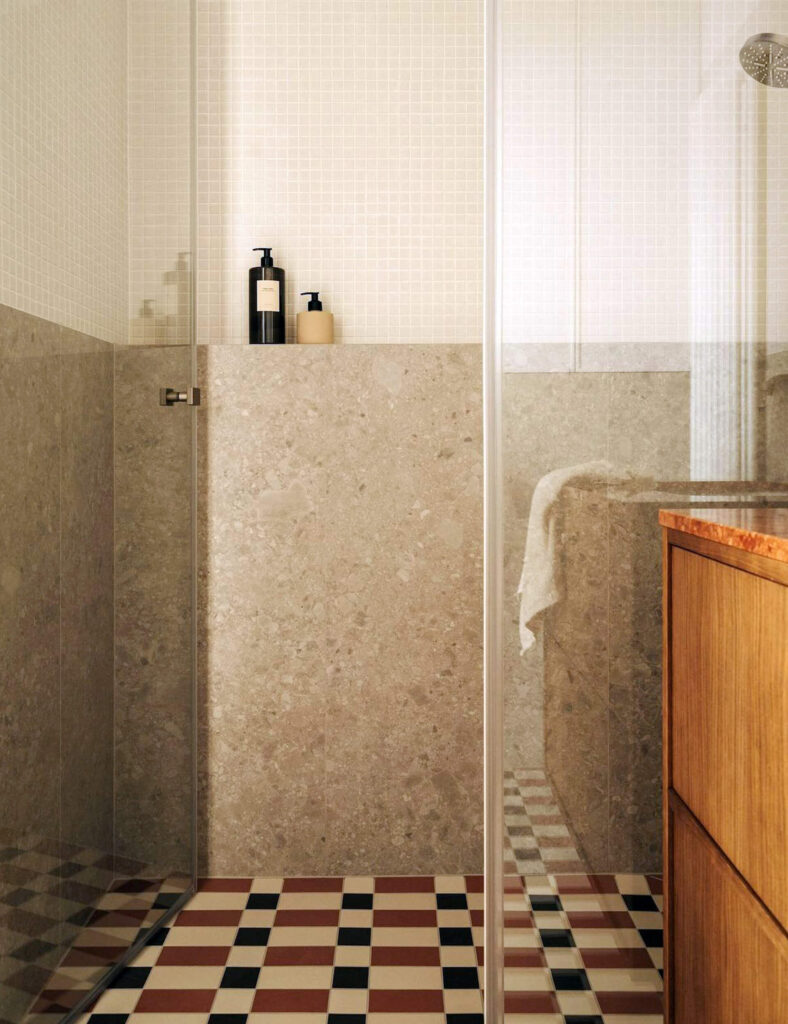
7. Shower: Built-In and Invisible
In a small bathroom renovation, the shower usually takes up the most space — so it can make or break your layout.
What I chose:
At first, I dreamed of a curved shower tray with a cabin, but the exact product I wanted disappeared from the market. Instead, I went for a built-in rectangular shower tray with see-through glass doors. Using the same floor tiles for the shower base keeps the look clean and unified.
How you can adapt it:
- For an open, modern feel → go with a walk-in shower with a single glass partition.
- For corner spaces → consider sliding or bi-fold glass doors instead of swing doors.
- For budget-friendly remodels → a prefabricated tray works, but choose the thinnest profile you can find to avoid bulky edges.
Pro tip: Transparent or frameless glass makes the bathroom feel twice as open compared to frosted or framed options.
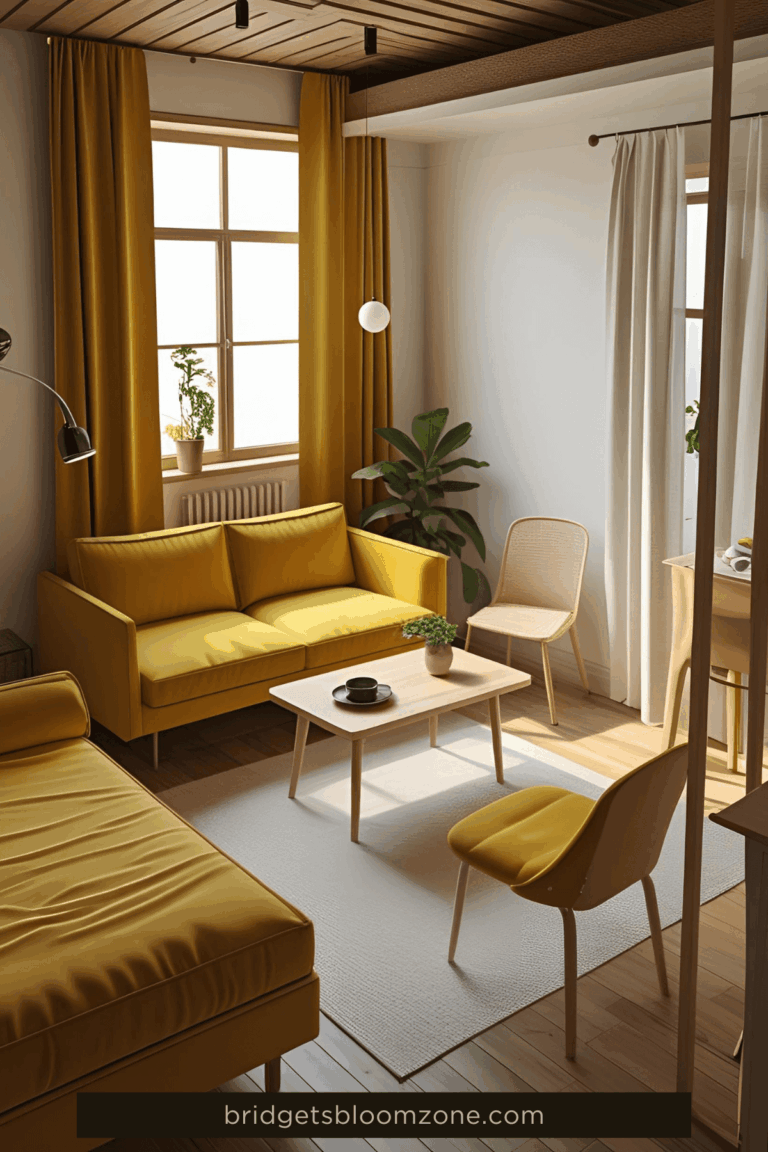
Mini Recap of My Studio Apartment Renovation + Progress Update
If you’ve been following along, you know the past few weeks were all about dust, noise, and a lot of plaster-chipping — we were deep in bathroom demolition mode.
What happened before?
Here is the “main hub” for our studio apartment renovation journey.
Layout design was already a topic a few times:
- Here is my post about how to design a functional layout for small apartments
- And last week’s post about studio apartment layout ideas.
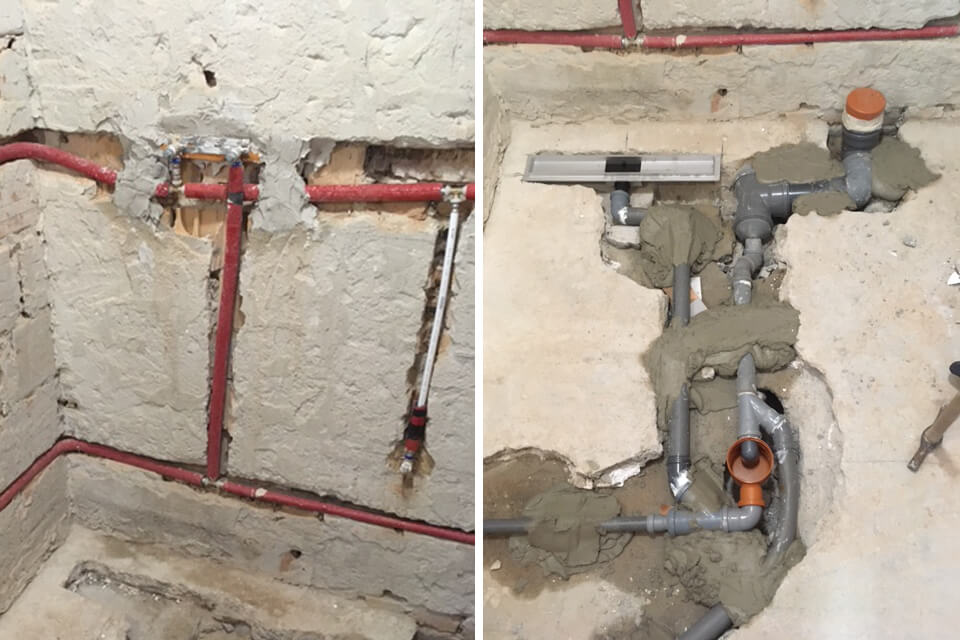
The bathroom – update:
Demolition? Finally finished!
We did it all by hand — first super careful (too careful?), then gradually bolder. Bit by bit, we chiseled the concrete away from the old iron pipes. Tedious work, but kind of therapeutic… in a dusty, slightly back-breaking way.
I definitely do not want to do it again – next time we are going to hire someone to do this awful work.
Plumbing? Done in two days!
Thanks to my amazing dad, who jumped in to help. (He used to work in this field, so everything went like clockwork.)
And yes — funny story: my fiancé and my dad did this whole thing as their “bonding activity.” My fiancé was ready to cut through the old pipes like a movie stuntman, but my dad insisted they could be unscrewed, one by one.
My fiancé, thinking he wanted to keep them, spent hours helping dismantle everything — only to find out later… we were not keeping them. We just brought them to the waste station. Sustainable? Absolutely. Efficient? Well… character-building!
What’s Next in Our Studio Apartment Renovation?
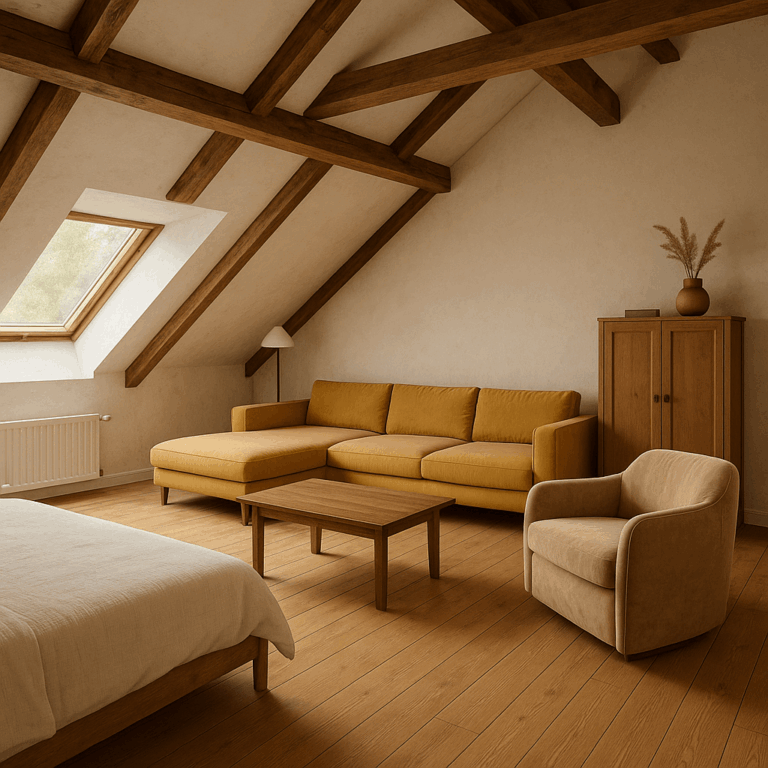
The bathroom may be stealing the spotlight right now, but next week I’ll be sharing something completely different: our DIY drywall niche in the bedroom.
I’ve been dreaming of a built-in that’s not only practical (extra storage, finally!) but also gives our tiny studio that clean, custom look I love. And because we’re doing it ourselves, there’s plenty of trial, error, and sawdust along the way.
Also you can learn why it was necessary for electricity!
Oh, one more update: the electricity works are finally done. Not exactly the sexiest part of a renovation (wires don’t photograph well, sadly), but I’ve learned a ton about conduits, circuits, and why patience is an actual building material.
So, if you’re curious about DIY niches or want the honest version of how we survived electrical chaos, stay tuned — the story is coming soon.
Takeaway
My Takeaways from This Bathroom Phase
So, what have we learned so far in this very small bathroom renovation?
- Planning is everything. Even in tiny spaces, details matter — from tile layout to tap placement.
- Storage can’t wait. If you don’t carve out the space for it now, it’ll haunt you later.
- Lighting makes or breaks the vibe. Functional + cozy beats “one big blinding bulb” every time.
- Floating is freedom. When the floor is visible, the room instantly feels bigger.
- Bold details are worth it. Whether it’s a blue ceiling, playful grout, or a statement mirror, one brave choice can transform a minimalist space into something memorable.
After demolition, mistakes, and starting over (a few times!), I can finally see the bathroom becoming what we imagined: smart, funny, cozy, minimal.
Now It’s Your Turn!
What’s your biggest bathroom challenge right now?
- Too little storage?
- No space for a proper shower?
- Lighting that makes you look like you live in a cave?
Drop your struggles in the comments — I’d love to hear. Who knows, your challenge might even inspire my next post.
And if you’re in the middle of planning your own renovation, here’s a quick tip:
Sketch your bathroom layout. Even a rough doodle helps you spot what feels cramped, what could float, and where you might add storage. If there’s no budget for a remodel right now, start small — decluttering is also design!
Don’t forget:
Save this post to your Pinterest board for later.
Subscribe below for updates on our studio renovation journey (and fresh ideas for small-space living).