Renovating a Studio Apartment Interior – Part 4, Demolition
Our studio apartment interior received the foreshocks in real life
This week’s update in our studio apartment interior renovation smells like concrete dust and indecision. We finally started the demolition, and let me tell you — hearing walls come down is both deeply satisfying and incredibly nerve-wracking. The mess? Unbelievable. The noise? Even worse. The adrenaline rush of seeing things transform? Totally worth it.
But here’s the twist: in between hauling rubble and trying not to panic about invisible pipes, I somehow spiraled into choosing materials for the entire apartment. From floor tiles to kitchen backsplashes, my Pinterest boards exploded — and so did my screen time.
Renovating a studio apartment interior means every choice matters. You’re not just picking finishes — you’re shaping the atmosphere of your entire home in a single glance. And as I’ve learned this week, that can feel like both a creative playground… and a total mental overload.
Actually, this week was way longer, than expected. The whole demolition part took almost 3 weeks – we are already in delay, but almost haven’t started anything yet. But I decided to follow my structure of a weekly posts, and I just compressed it into one post. Considered the time, and the fact that both of us have a job, we did not have that much time during each week – I calculated that the whole process took 7 full days. So, we could say, it was a week.
What You’ll Learn in This Post
- What really happens during a demolition phase – what to pay attention to
- How to stay calm while everything turns to dust
- How I approach material selections in a small space
- Tips on how to make sure your finishes work together (for the space, style, and the building’s vibe)
- A gentle reminder: Pinterest boards do count as progress
Mini Recap of the Project
In case you’re just joining — welcome to the chaos! I’m currently renovating a tiny studio apartment interior from scratch, and every week I’m documenting the full journey, from layout dilemmas to light switch debates. I’m an architect by day, renovation diary keeper by night — and this project is both my test lab and creative outlet.
If you want to catch up from the beginning, you can start with the main renovation diary here, or browse the earlier weeks:
Week 1: Big Dreams and Visions
Week 2: How to design a functional layout
Week 3: Budgeting for a Studio Renovation
Spoiler: it’s a very small space, but every week I’m realizing how much potential it actually has.
Studio Apartment Interior Demolition and Material Planning
Let’s start with the hammer! Demolition, the dusty reality
This week was loud, dusty, and kind of terrifying.
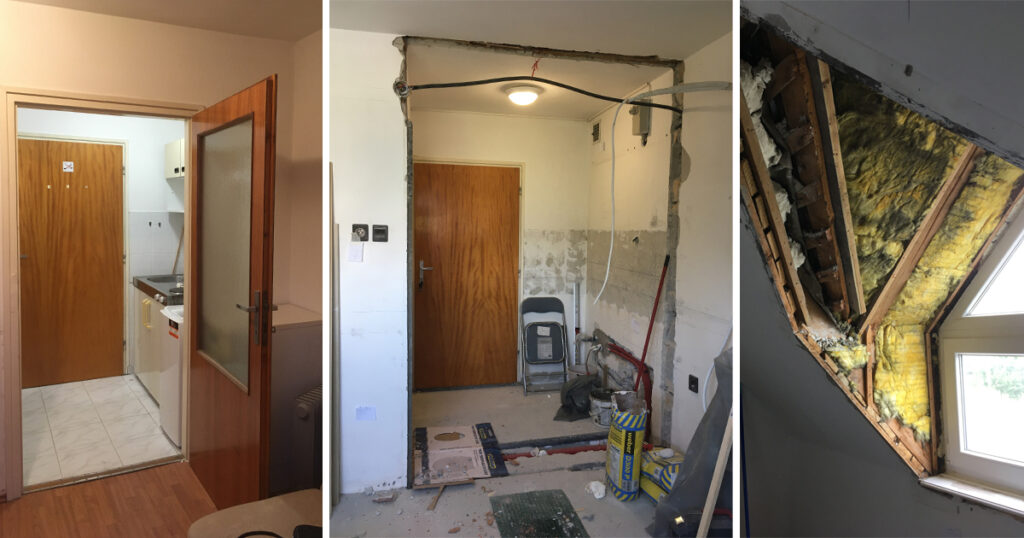
We officially stepped into the demolition phase — and even though I’d carefully planned every step on paper, nothing could’ve prepared me for the emotional side of seeing an entire space torn apart. The noise and mess were expected, but for a moment, it felt like the whole building might collapse under our hands. (Surprise: it didn’t.)
 We started with the old kitchen — off came the wall-mounted cabinets, the old tiles, and the worn-out flooring.
Next came the room: Underneath the laminate, we discovered a fully carpeted floor glued down with prehistoric adhesive, which we had to scrape off by hand. Pro tip: It’s easier with an angle grinder! We’re still working on demolishing the upper concrete layer in that area.
Then came the bathroom, which was completely gutted: out went the old shower, toilet, all tiles, and even the original cast iron pipes embedded in the walls. Add in countless outdated electrical cables and a fair bit of head-scratching every time we cut into a wall.
The roof window niche was one of the cutest part — I almost felt sad that we are deleting it. It used to be covered in outdated wooden paneling, and once we stripped it, we found not one but several wasp nests, and even a tiny abandoned bat nest. Luckily, all of it was abandoned!
Oh, and the wall between the kitchen/entry and the main room? It’s gone. It included a narrow door and served no real purpose in the layout anymore. Removing it instantly made the studio apartment interior feel bigger and airier — even in its raw, exposed state. And the best, it was super fast!
By the end of the 7 days, we had cleared out over 1,500 kg of debris, hauling it all to the local construction waste site (called a waste collection point, for anyone wondering). And yes — there’s still more to go.
It’s worth repeating: demolition in a studio apartment renovation might sound like a small task, but it can feel massive. The dust, the uncertainty, the sight of stripped walls and exposed cables — it’s a lot. But this messy middle is where the magic begins. Once everything was cleared and the noise settled, I could finally start seeing the future space with fresh eyes.
Ready to be built. Ready to become home.
Making Space for Possibilities – Changes in the Floor Plan?
Once the wall came down and the last tile was chipped away, something strange happened: I stood in the middle of the dust, wires, and echoes — and suddenly saw a dozen other layouts.
Even though I already had my final plan ready (and still love it!), the openness of the space sparked a wave of new ideas. That’s the beauty of this stage: when everything is stripped back, your imagination fills in the gaps. Just seeing how the light moves differently without that wall made me wonder, What if we flipped the bed? What if the kitchen would be hidden into an entry cabinet?
Nothing changed — but the process of playing with possibilities was joyful and freeing.
So here’s your reminder: it’s okay to rethink things during demolition. Being physically present in the space unlocks new perspectives. If your renovation is still flexible, allow yourself to pause and explore. You can literally draw new layouts on the walls or floors — I did! I even sketched the final furniture plan with a pencil on the concrete. Highly recommend. It’s fun, it’s visual, and it makes your future space feel more real.
(I may have also scribbled a secret message on the wooden beams of the roof that became exposed after the paneling was removed. Because why not.)
In an upcomming post I’ll share a few of these layout experiments as a playful side post — nothing major changed, but I think you’ll enjoy seeing the “what could’ve beens.” For now, let’s talk about finishes. Because once the rubble was cleared, it was time for something beautiful…
Moodboard of materials
After the chaos of demolition, the silence felt almost sacred. Suddenly, everything looked like a blank canvas — and it was time to start painting with textures.
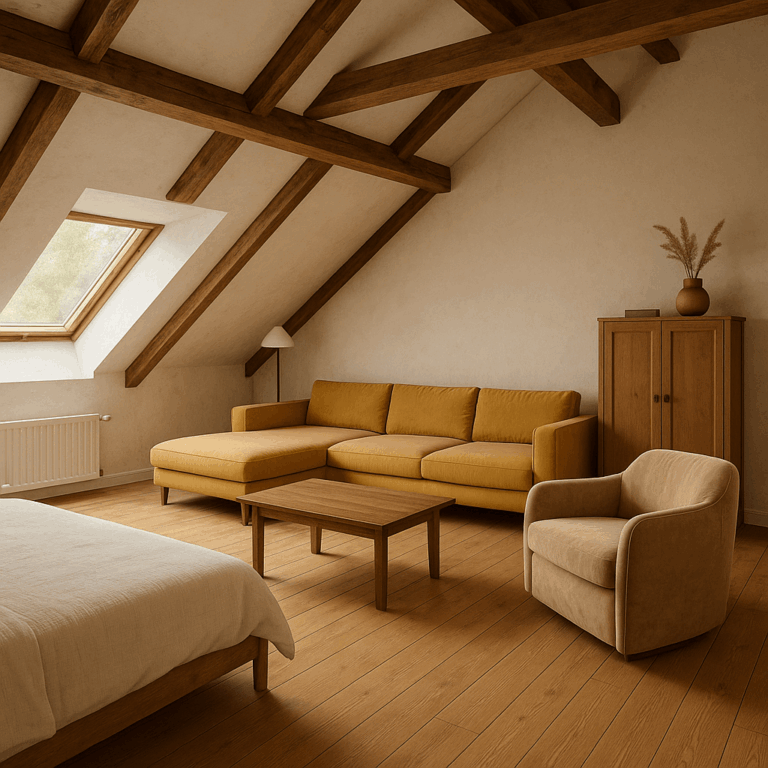
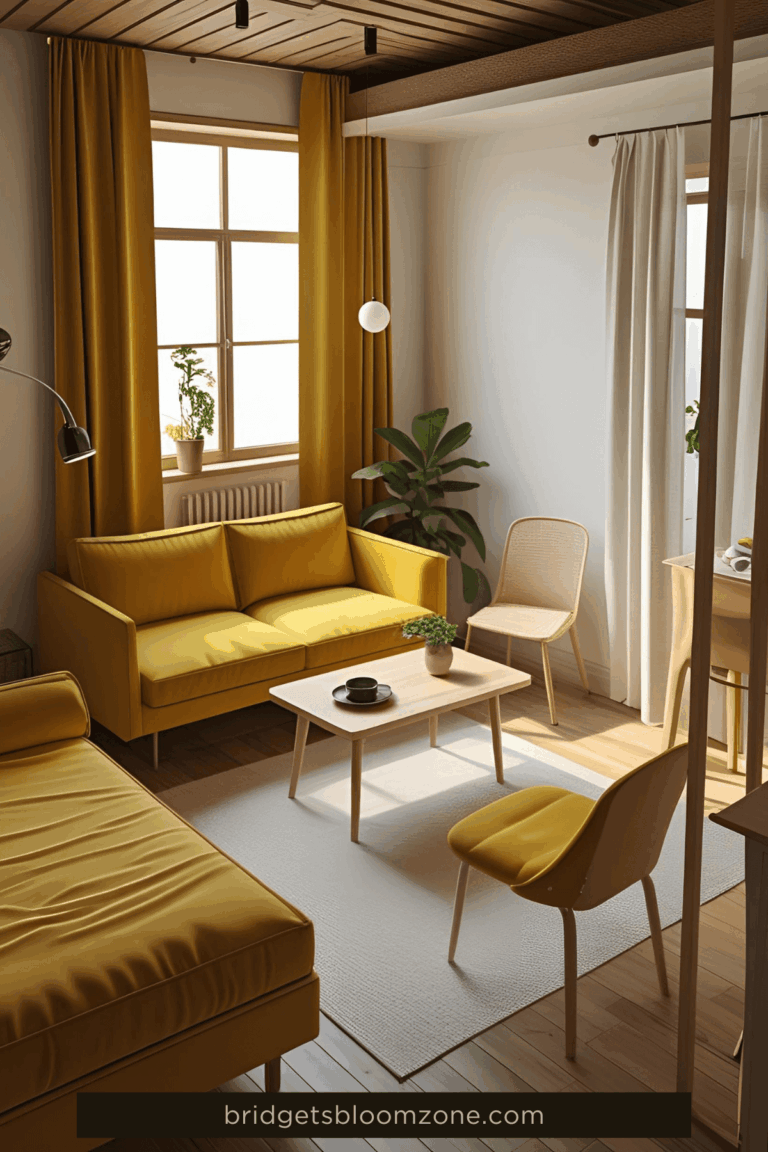
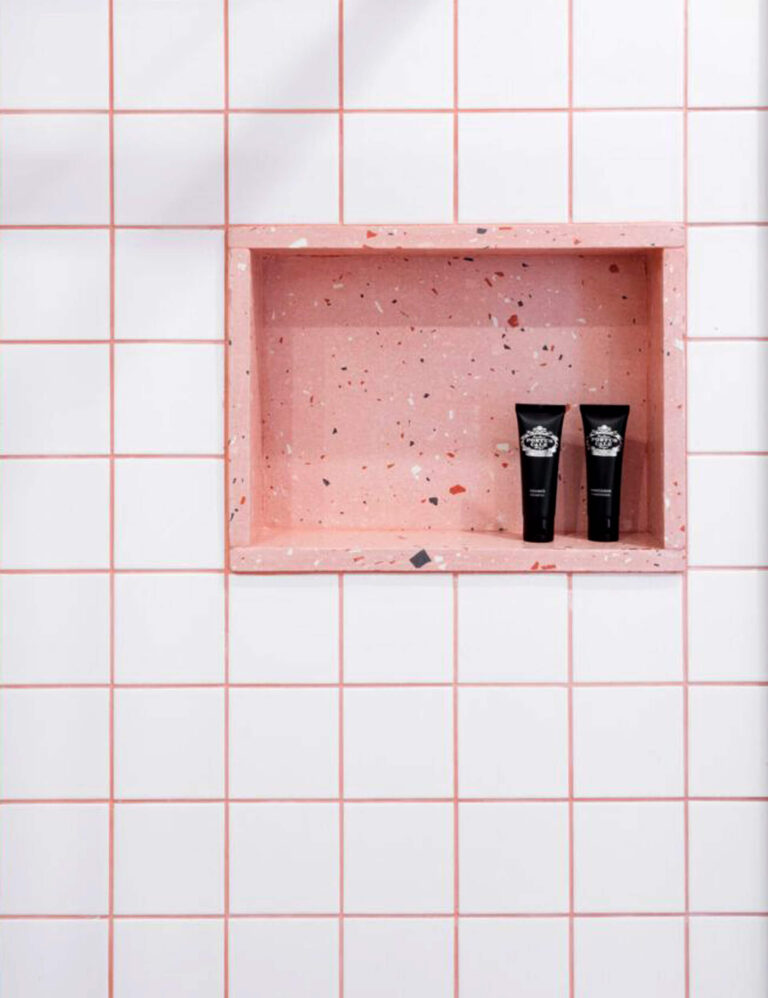
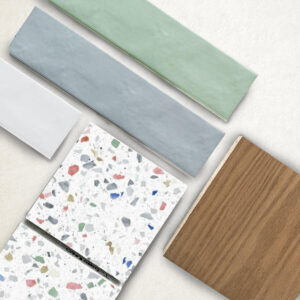
If you’ve been following along, you might remember that terrazzo has been on my radar since the very beginning. And now I finally picked the one. It’s a playful, slightly chaotic pattern — full of tiny colorful fragments that somehow still feel balanced. It adds just the right amount of fun to our simple studio apartment interior, without overwhelming the space.
From that one terrazzo tile, everything else started falling into place. I built the entire material palette for the studio apartment around it — and it turned into a mix of warm wood, clean white, and soft color notes that balance cozy and smart. Here’s what I ended up choosing:
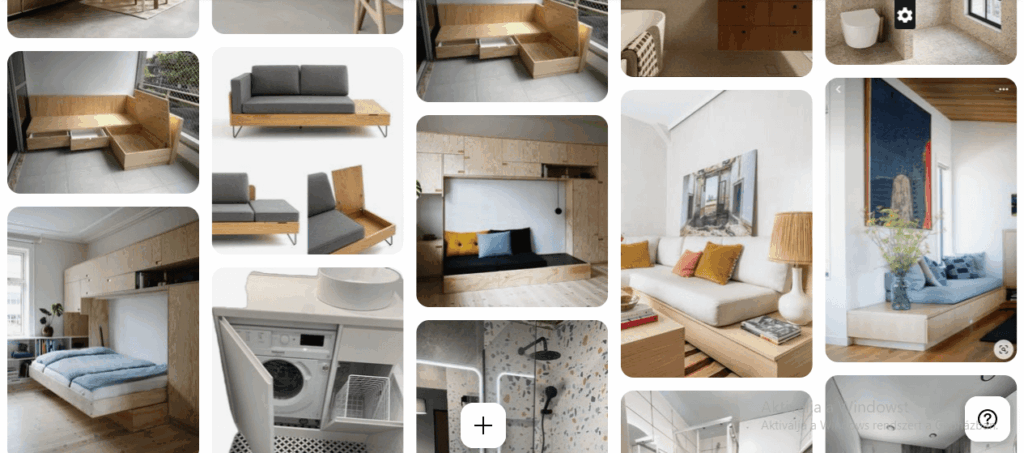
- A warm wood-effect vinyl floor throughout the living, kitchen, and entrance — because it’s soft underfoot, budget-friendly, and super easy to clean.
- A wooden kitchen cabinet and matching sofa base, adding visual warmth and cohesion to the open space.
- Simple, white furniture pieces in the sleeping area: bed, wardrobe, and nightstands — to keep the vibe calm and airy.
Colorful accents coming from textiles: this is where I’m still playing! I experimented with curtain fabrics (for shading and room dividing) and soft upholstery for the sofa. Think mustard yellows, olive greens, and terracotta — lets add some character! But Always think in combinations, as soon as the shade of the sofa’s wood is choosed, the color of its textile is also determined – they have to match.
Below, you’ll see some of the moodboards I’ve created — combinations of tiles, textiles, and furniture sketches that helped me visualize how everything ties together. You’ll also notice how one material decision leads to the next. It’s a domino effect, and the more you experiment, the more confident you get in your overall design direction.
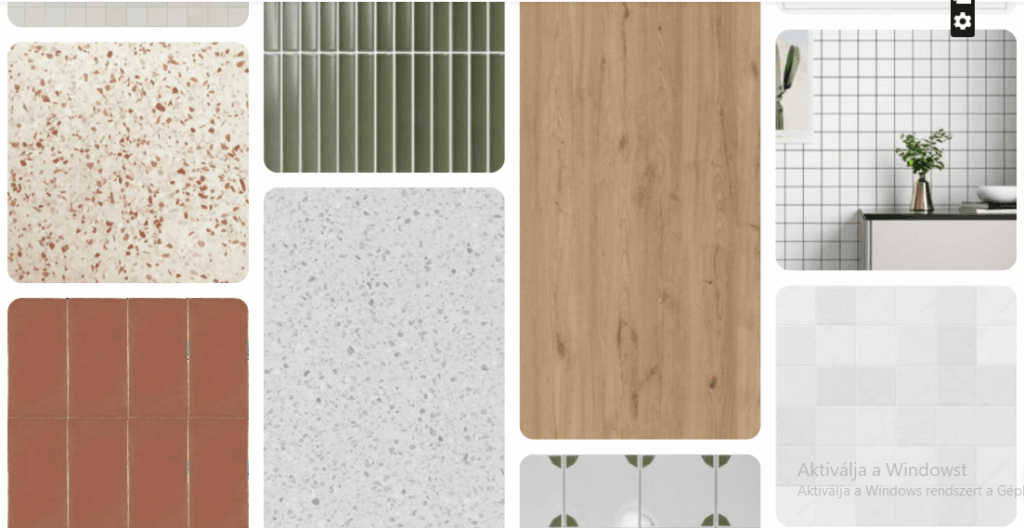
For anyone else renovating a tiny space: don’t underestimate how flexible a small studio apartment interior can be. You don’t need to go all-white or ultra-minimalist. With just a few good choices, your materials can bring out personality, warmth, and cohesion — even in 16 square meters.
What surprised me during the process?
I honestly didn’t expect to feel this overwhelmed.
Not by the dust, or the noise — those are part of the deal. I felt something deeper. Logically, I knew we weren’t touching anything structural. But emotionally? It felt huge. (Especially when my fiancé started to eliminate the wall.)
Now, with everything cleared and cleaned, I realize this phase was more psychological than physical. The mess doesn’t just affect the space — it crawls into your head. So if you’re here too, just know: this feeling is normal. And temporary.
The antidote? Start making beautiful decisions.
I found that choosing materials gave me something to hold onto — quite literally. Laying out the tiles, wood samples, and fabric swatches helped me visualize what this future home will feel like, not just what it’ll look like.
The final materials: Here’s what helped me organize my choices:

Start with the main finishes. These are your base layer — floors, wall tiles, major surfaces. They should harmonize in tone, warmth, and saturation. Think of them like background music: they set the mood.

Pick furniture that feels permanent. These are bigger investments — a sofa, bed, kitchen cabinets. Go for quality, but also personality. I like when furniture adds a touch of contrast to the finishes — something that pops just a bit. All-white everything can feel sterile fast, especially in small spaces where things are always visible.

Textiles are your secret weapon. They’re easier to switch, and they carry so much emotion. Curtains, rugs, sofa fabrics — these can echo the mood of your space or introduce a fresh tone. Bonus: they’re the easiest way to personalize, adapt, or evolve a room later.

Wall paint is an extra variable. I consider it as furniture material, you can change it from time to time – but still quite determinative. I prefer always a shade of white, especially in small or in places where there is little natural light
And don’t forget: Pinterest boards are your friend. I constantly pinned, rearranged, and cross-referenced my ideas. It helps to see things together — and to save those little moments of inspiration for the days when things feel chaotic.
My observation: try to keep your space – where you live during a renovation – extra clean. It may seem to be just an extra task, but it feels so much better to finish the work, and “go home” to a nice, clean, organized space. It is easier to calm your mind.
Helpful Tips for Navigating the Demolition and Design Phase
If you’re renovating a studio apartment interior, this chaotic-but-crucial phase can feel like a storm before the calm. Here are a few bite-sized tips to make it more bearable — and even a little fun.
1. Prep Your Mind — and Your Stuff
Demolition is loud, dusty, and disorienting. Even in a small flat. Pack up everything, seal the rest, and mentally prepare to feel like you’re camping inside a construction site.
2. Don’t Panic When You Get New Ideas
Watching a wall come down can suddenly open so many layout possibilities. Let your brain wander. Sketch new options. But don’t feel pressured to redo everything — it’s just part of the process.
Bonus idea: draw your floor plan right on the floor! It’s surprisingly helpful and really fun.
3. Finalize Finishes in Layers
Think of your material choices in “layers”:
- Base finishes: floors, tiles, walls
- Key furniture: cabinets, bed, sofa
- Textiles: curtains, carpets, throws
Choose your base finishes first, then build up. It helps everything stay cohesive, even in a tiny space.
4. Save a Pin Board for Every Zone
Even a tiny studio has zones: kitchen, sleeping nook, sofa area. Make a Pinterest board or mini collage for each — it’ll help you stay focused and inspired when you’re elbow-deep in glue or grout.
5. Don’t Be Afraid of Personality
Just because the space is small doesn’t mean it has to be minimal. Let your finishes and textiles speak a bit louder. A playful terrazzo, a bold curtain, or a soft checkered throw can make your interior feel unique and loved.
Which of these surprised you most? Or which one do you always forget until it’s too late? Drop a comment — I’d love to swap renovation stories.
Up Next: Pipes, Cables & Secret Layout Tweaks (Help Me Choose!)
Now that everything’s torn down and cleaned up, we can finally start building something — even if it’s the invisible kind. Next week we’ll dive into the behind-the-scenes essentials: electrical cables, water pipes, and all the stuff that makes the magic happen (but no one ever sees).
Plus, I’ll share a few fun layout variations I experimented with — yes, all squeezed into just 16 sqm! Don’t miss it.
Curious which plan made it to the final round? Or want to vote for your favorite? Come back next week and help me decide!
Architect’s Angle
Demolition might look chaotic, but it’s one of the most revealing moments in a renovation. As an architect, I’m always fascinated by what’s behind the surfaces — old structures, hidden materials, even the weird surprises (bat nest, anyone?). This week reminded me how important it is to stay flexible: the space starts speaking once the walls come down.
Material selection, too, is more than just matching colors. It’s about layering functionality, emotion, and story — especially in a studio apartment interior, where every square meter needs to do double duty. When you get it right, even 16 sqm can feel comfortable, smart, cozy, and full of personality.
Your Turn
What was the wildest thing you’ve ever discovered during a renovation? Hidden wallpaper? A secret message? Let me know in the comments!
And if you’re deep in a makeover or just dreaming about one — pin your favorite material combo from this post and follow along. The next steps are messy, invisible… and totally essential.
Browse the full renovation diary here.
And don’t forget to save the Pinterest image at the end!